Lesson 6: Creating an ad group
In the previous lesson, we covered the settings at the campaign level.
In this lesson, we will look at how to create an ad group.
As we mentioned in the previous lesson, an ad campaign consists of at least one ad group. It takes two steps to create an ad group:
- create an ad
- choose settings at the ad group level
Let’s look at them in order.
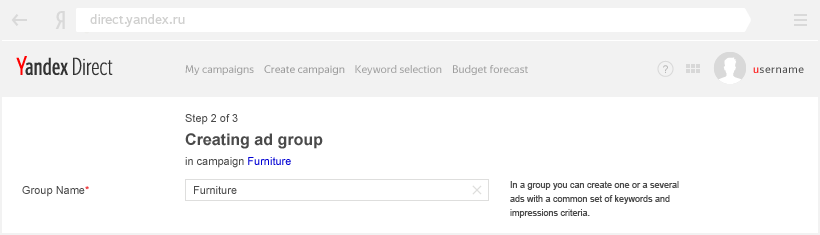
1/10 Enter a name for the ad group
Choose a name that will make it easier for you to find within the overall campaign. The name of the group is up to you — you are the only one that will see it.
2/10 Select the ad type
3/10 Ad title and text
You ad title and text should tell your potential customers about your products or services:
- Specify what sets your offer apart from others.
- Respond to the user’s search query as directly as possible: offer users exactly what they are looking for.
- Remember that any words in your ad text that are present in a user’s search query will appear in bold (and better grab users’ attention). You can increase the amount of bold text in your ads by using templates that automatically insert keywords into your ad texts.
The second ad title appears in specific situations, depending on the area available that the titles will take up. We recommend you come up with ad titles that can complement each other when appearing together, but also make sense when appearing separately. Best of all are short, attractive phrases about the advantages of your offer: “Discounts up to 70%!” “Free delivery” “In stock” “Up to 70% off!” “Free delivery!” “Next-day delivery!” etc.
On the right hand side, you can check how the ad will look on different sites.


4/10 Enter the link to your site
This is the address of the page where users will be redirected when they click on your ad. This page’s content should correspond to the text of your ad and the user’s search query. The degree to which they correspond is what we refer to as relevance. The more relevant your ad is, the higher its quality coefficient. Higher quality coefficients can lead to lower CPC.

5/10 Enter the display link
This is the address of the page of your site that will be visible in your ad.

We recommend using a display link that is easy to read and clearly shows where it leads.

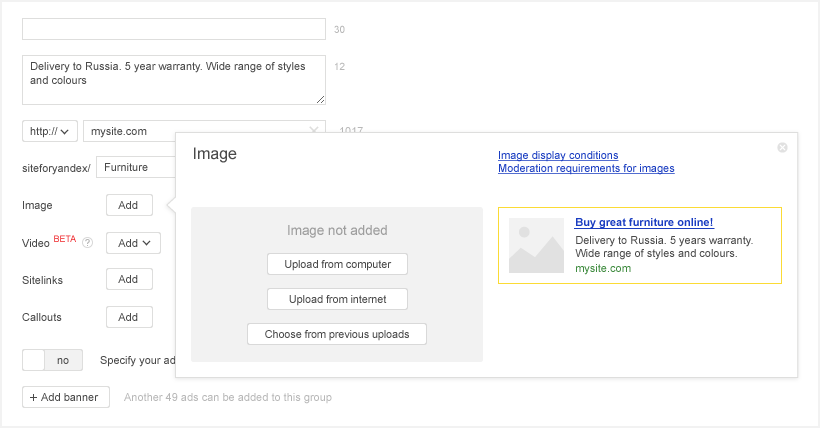
6/10 Add an image
Ads with images can appear on sites in the Yandex Advertising Network and other external ad networks. They do a better job at grabbing users’ attention, with 2.5X higher conversion rates. Remember that your ad’s image should clearly correspond to the product or service that you are selling.
7/10 Add video extensions
Video extensions are another way to increase your ads’ CTR. You don’t need any expertise or experience making video content — Yandex.Direct automatically generates video using your Text & Image ads, turning your static ads into an animated ad block. These video ads can appear in the Yandex Video Network.
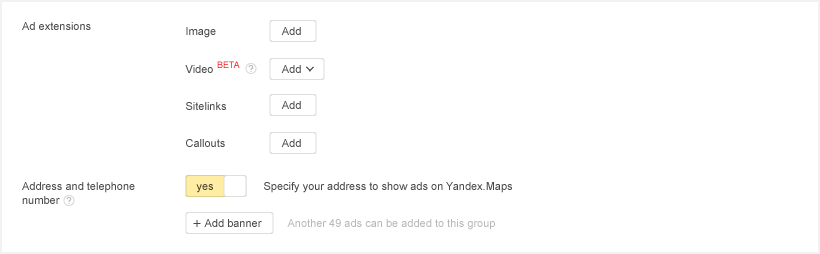
8/10 Enter sitelinks
Sitelinks increase ads’ CTR by up to 20% by making it easier for users to quickly find the section of the site they need. You can use sitelinks to draw attention to the advantages of your offer, show additional product information, or provide links to different product groups. Sitelinks must lead to pages of the site being advertised, product or service pages on Yandex.Market or to social networks.

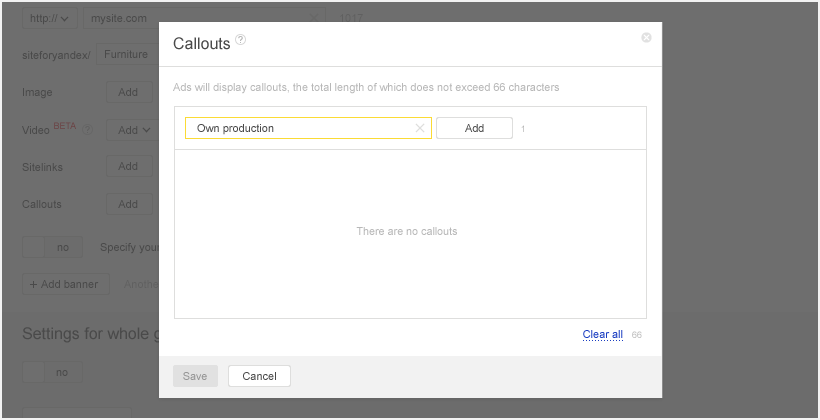
9/10 Add callouts
Callouts are short texts that allow you to briefly describe the advantages of your offer. Callouts are not clickable, but give you extra room to mention anything you could not fit into the main ad text. They appear in ads in first Premium placement on desktop computers and on all devices in ads in the Yandex Advertising Network.
10/10 Enter your address, phone number and working hours to your vCard
vCards make it easy for users to contact you even if they don’t visit your site. On mobile search results pages, your ad will feature a telephone button that lets users dial the number in your vCard in just one tap.

Fill out as many fields in the vCard as possible — this is what users will see when they click on your contact information.

Now let’s move on to the next step.
Add previously selected keywords to the keyword field.
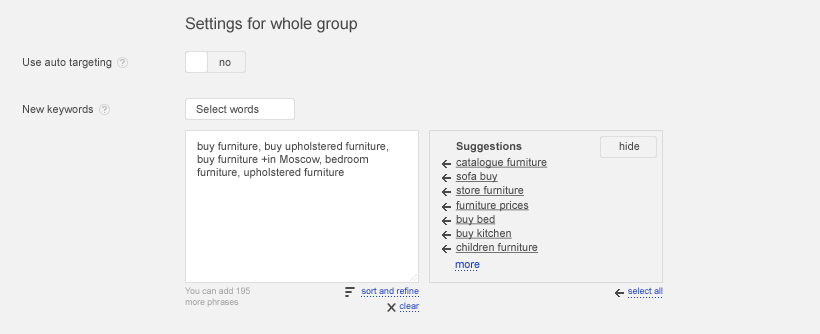
As you add keywords, hints will appear to the right. Select the relevant ones to expand your keyword list. Make sure that the keywords you choose match your ad text and landing page.
To add to your keyword list, you can also click the “Select words” button.

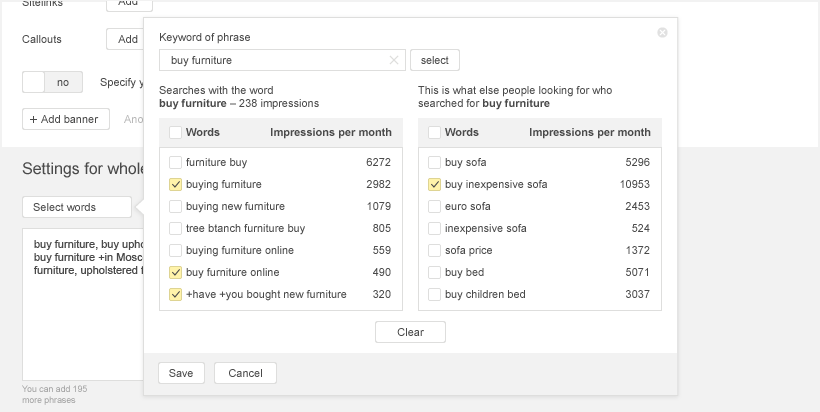
Simply enter a keyword and click “Select.”
Detailed information from WordStat, including the number of monthly impressions, will appear for the additional keywords suggested. Select the ones you consider relevant for your campaign and click “Save.”
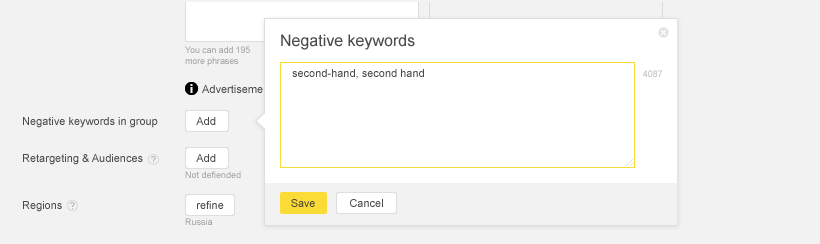
Add negative keywords that you previously selected.
As we mentioned in Lesson 2, you can get by without keywords by enabling autotargeting and launching your search ads without keywords.
Set a limit for the maximum click price.
If you chose a manual bid management strategy when setting up your campaign, or limited your CPC as part of an automatic strategy, set the maximum CPC. If you don’t do so, default values will be set. You can change the CPC for individual retargeting lists on the campaign page.
To increase your reach of mobile audiences, we recommend adding Turbo pages to your ads. Turbo pages in Yandex.Direct are additional mobile landing pages that load much faster on mobile devices.
Leave the rest of this page with its default settings. To finish creating the group, click Next.
We looked at how to create an ad group..
The first part involved:
- Entering a name for the ad group
- Creating an ad title and text
- Entering the link to your site and a display link
- Adding extensions like images, sitelinks, callouts and video
- Adding contact information
The second part involved:
- Adding keywords and negative keywords
- Setting limits for maximum CPC