Lesson 5: Monetization features
This option allows you to combine the Yandex Advertising Network and demand platforms integrated through Header Bidding into a single auction. For international traffic, you can use Google.
Header Bidding (HB) is a technology that allows you to poll multiple demand platforms when a user loads a site page and select the one with the highest bid among them.
The more ad networks participate in the auction for ad impressions on your site, the better your chances of maximizing your revenue.
The auction occurs at the level of dynamic monetization (Level 11).
Here’s the top-level diagram of banner impressions:

You can learn more about Adfox’s monetization features in Help.
Add your site to the Yandex Advertising Network. This will automatically submit it for moderation. Learn more about registering with the Yandex Advertising Network in Help. Once your site has passed moderation, you can proceed with the integration.
Step 1
Go to the Monetization tab, open the ‘Banner ads’ section, hover over the platform that you want to integrate with the Yandex Advertising Network, and click the plus icon.
If you don’t see any, add a new one. We have explained how to add a platform in the “Preparing to launch an ad campaign” module.

Step 2
In the window that opens, choose the site where you want to create the RTB unit. This unit will be linked to the platform you selected in Adfox. If you can’t find your site in the menu, make sure that it is active and has passed moderation in the Yandex Advertising Network.
Real-time bidding (RTB) is a technology for real-time advertising auctions.
Step 3
When the Yandex Advertising Network interface opens, select the ad unit type. Configure it and click Create.
Step 4
Save the RTB unit in the Adfox interface and wait until the ID of the created unit appears in the ID field of the Yandex Advertising Network unit. This means that the Yandex Advertising Network was integrated with the platform in Adfox.
This technology allows you to integrate:
- Yandex Header Bidding demand platforms
For example, MyTarget, Sape, Between Digital, Adriver, Sape, Gnezdo, and more. - Adfox Header Bidding demand platforms
In this case, the Adfox client acts as a demand platform.
The site owner (Adfox client) can integrate with another Adfox client who acts as an impression demand platform. For this, the client demand platform should become a Header Bidding demand platform. - Demand platforms integrated with the Prebid.js library
This allows you to monetize international traffic.
You can see a list of all demand platforms working with Adfox using Header Bidding in Help.
Important! The site owner must execute a direct contract with each demand platform. Then, in their account on the demand platform, the site owner needs to create an ad unit and save its ID: The site owner will need it to create a configuration script.
Let’s see how to integrate Header Bidding.
Step 1. Set up banner types and templates
- Decide which banner types you need for your demand platforms. Remember, these will define the ad placement. If needed, create new types.
We’ve explained how to do this in the “Preparing to launch an ad campaign” module.
- Add these templates to banner types:
- For Header Bidding demand platforms, use: Header Bidding {demand platform name} [context]
- For demand platforms working with Adfox Header Bidding, use: Header Bidding Adfox [context]
- For demand platforms working with Prebid Header Bidding, use: Header Bidding for Prebid [context]
Step 2. Configure campaigns and banners
- Add one ad campaign for each demand platform:
- Select the type: Dynamic Monetization.
Fill in the Name and Advertiser fields.
Select the demand platform in the External Monetizer parameter.
For demand platforms working with Adfox HB, specify the demand platform’s account ID in Adfox (ownerId). You can obtain this from the demand platform or the ad tag.
If you’re buying ads from an Adfox seller, you need to request the ownerId from them. You can set CPM in your account on the demand platform.
- Select the type: Dynamic Monetization.
- Select the site, section, or placement for the campaign in the Placement tab.
- Choose the banner type and template on the Banners tab.
- Enter the banner’s name and click Save.
Step 3. Create and implement a configuration script.
- Go to the tab Monetization → HB configurator.
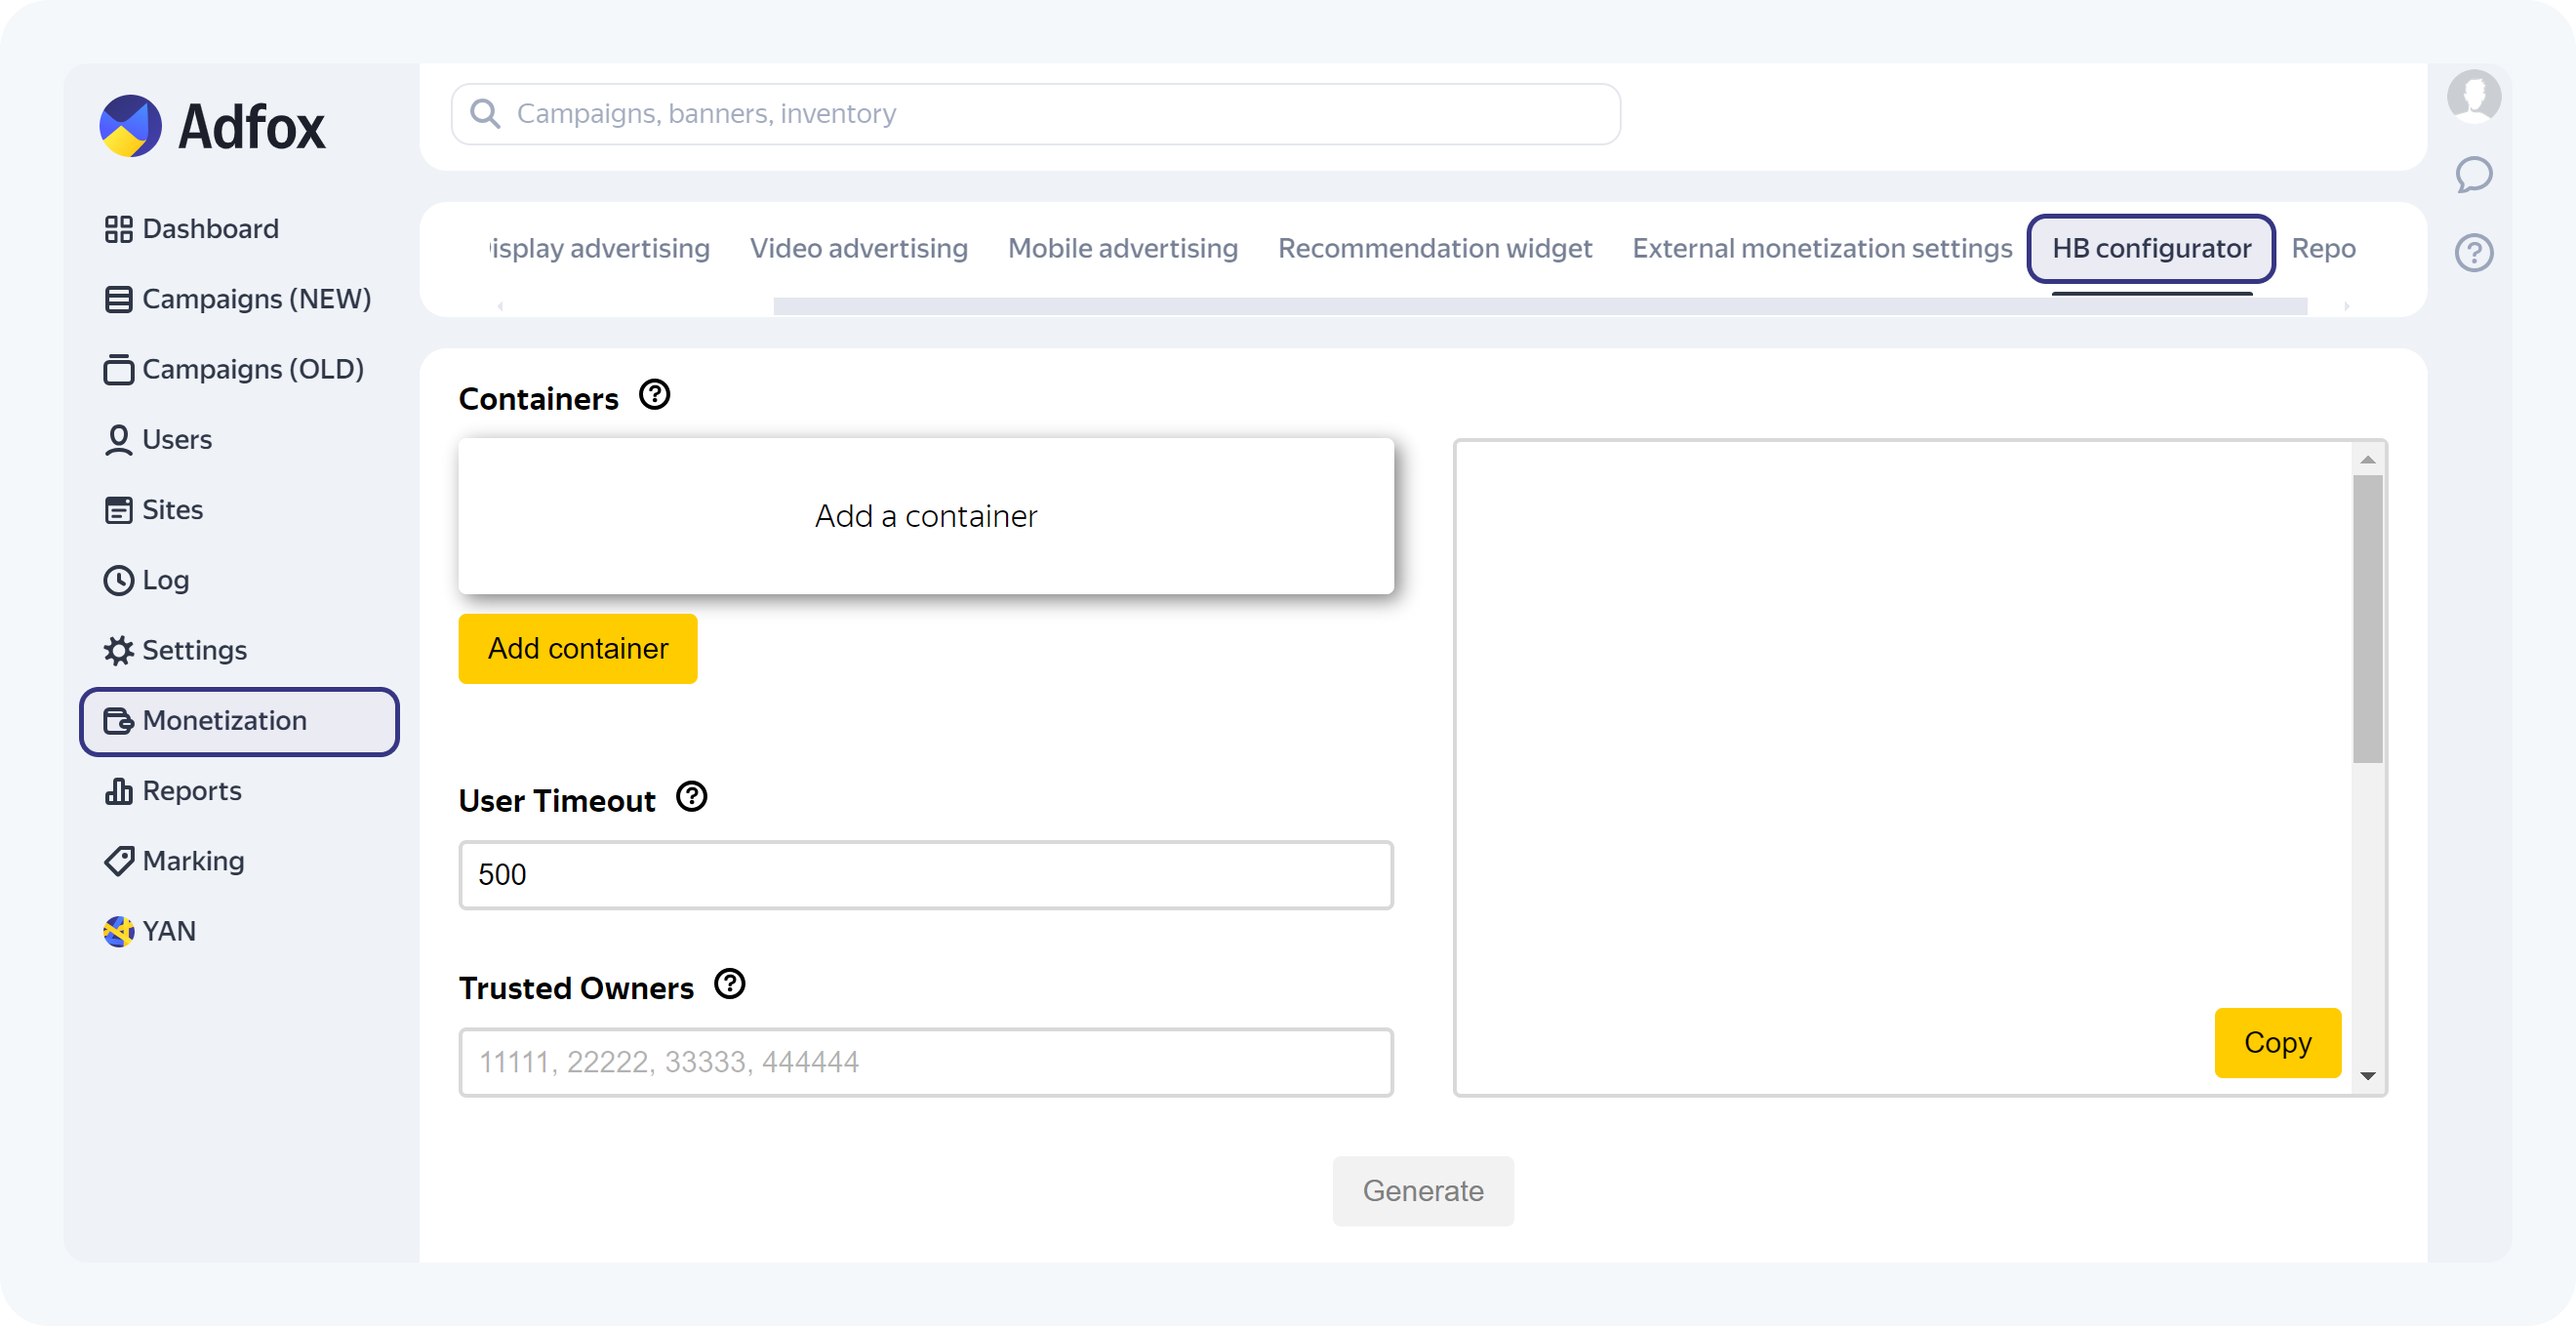
- Click ‘Add container’ and enter its ID.
Where can you get this ID from?
- Open the site page with the ad placement you want to integrate with the demand platform
- Copy the
containerIdvalue from the Adfox ad tag.
If you haven’t added the ad tag to your site, place it first, then copy the
containerIdfrom the placed tag.Important! Don’t use the
containerIdfrom the Adfox interface. The value in the ad tag changes every time it is generated. - Click Add monetizer.
- Choose a monetizer and set the ‘Monetizer’s placement ID’. Request it from the monetizer directly.
If your monetizer is Adfox HB, enter the entire value from the ad tag.
- Click Generate.
Copy the obtained ad tag and place it within the <head> tag of your site or its selected pages. After this, the placement in Adfox will be integrated with the demand platform via Header Bidding.
You can use the advertising console to check bids and make sure everything is up and running:
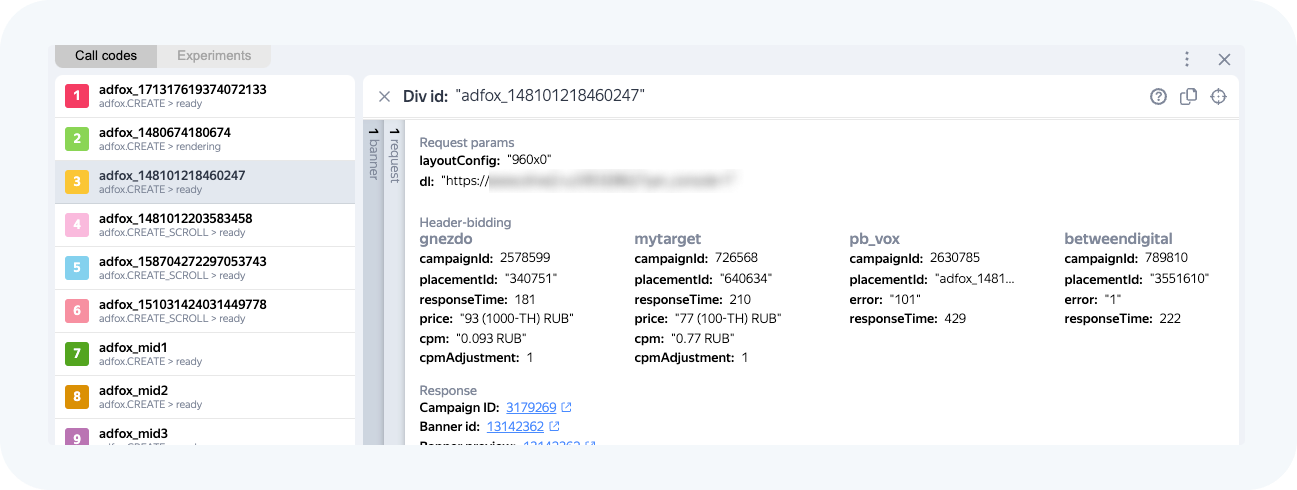
We explained how to access the advertising console in the ‘Preparing to launch an ad campaign’ module.
For international traffic, you can connect Google under Dynamic Monetization and get automated bid forecasts. To do this, you'll need to create a set of settings with CPM floors.
Note! To integrate Google, you'll need to specify certain settings in Google Ad Manager.
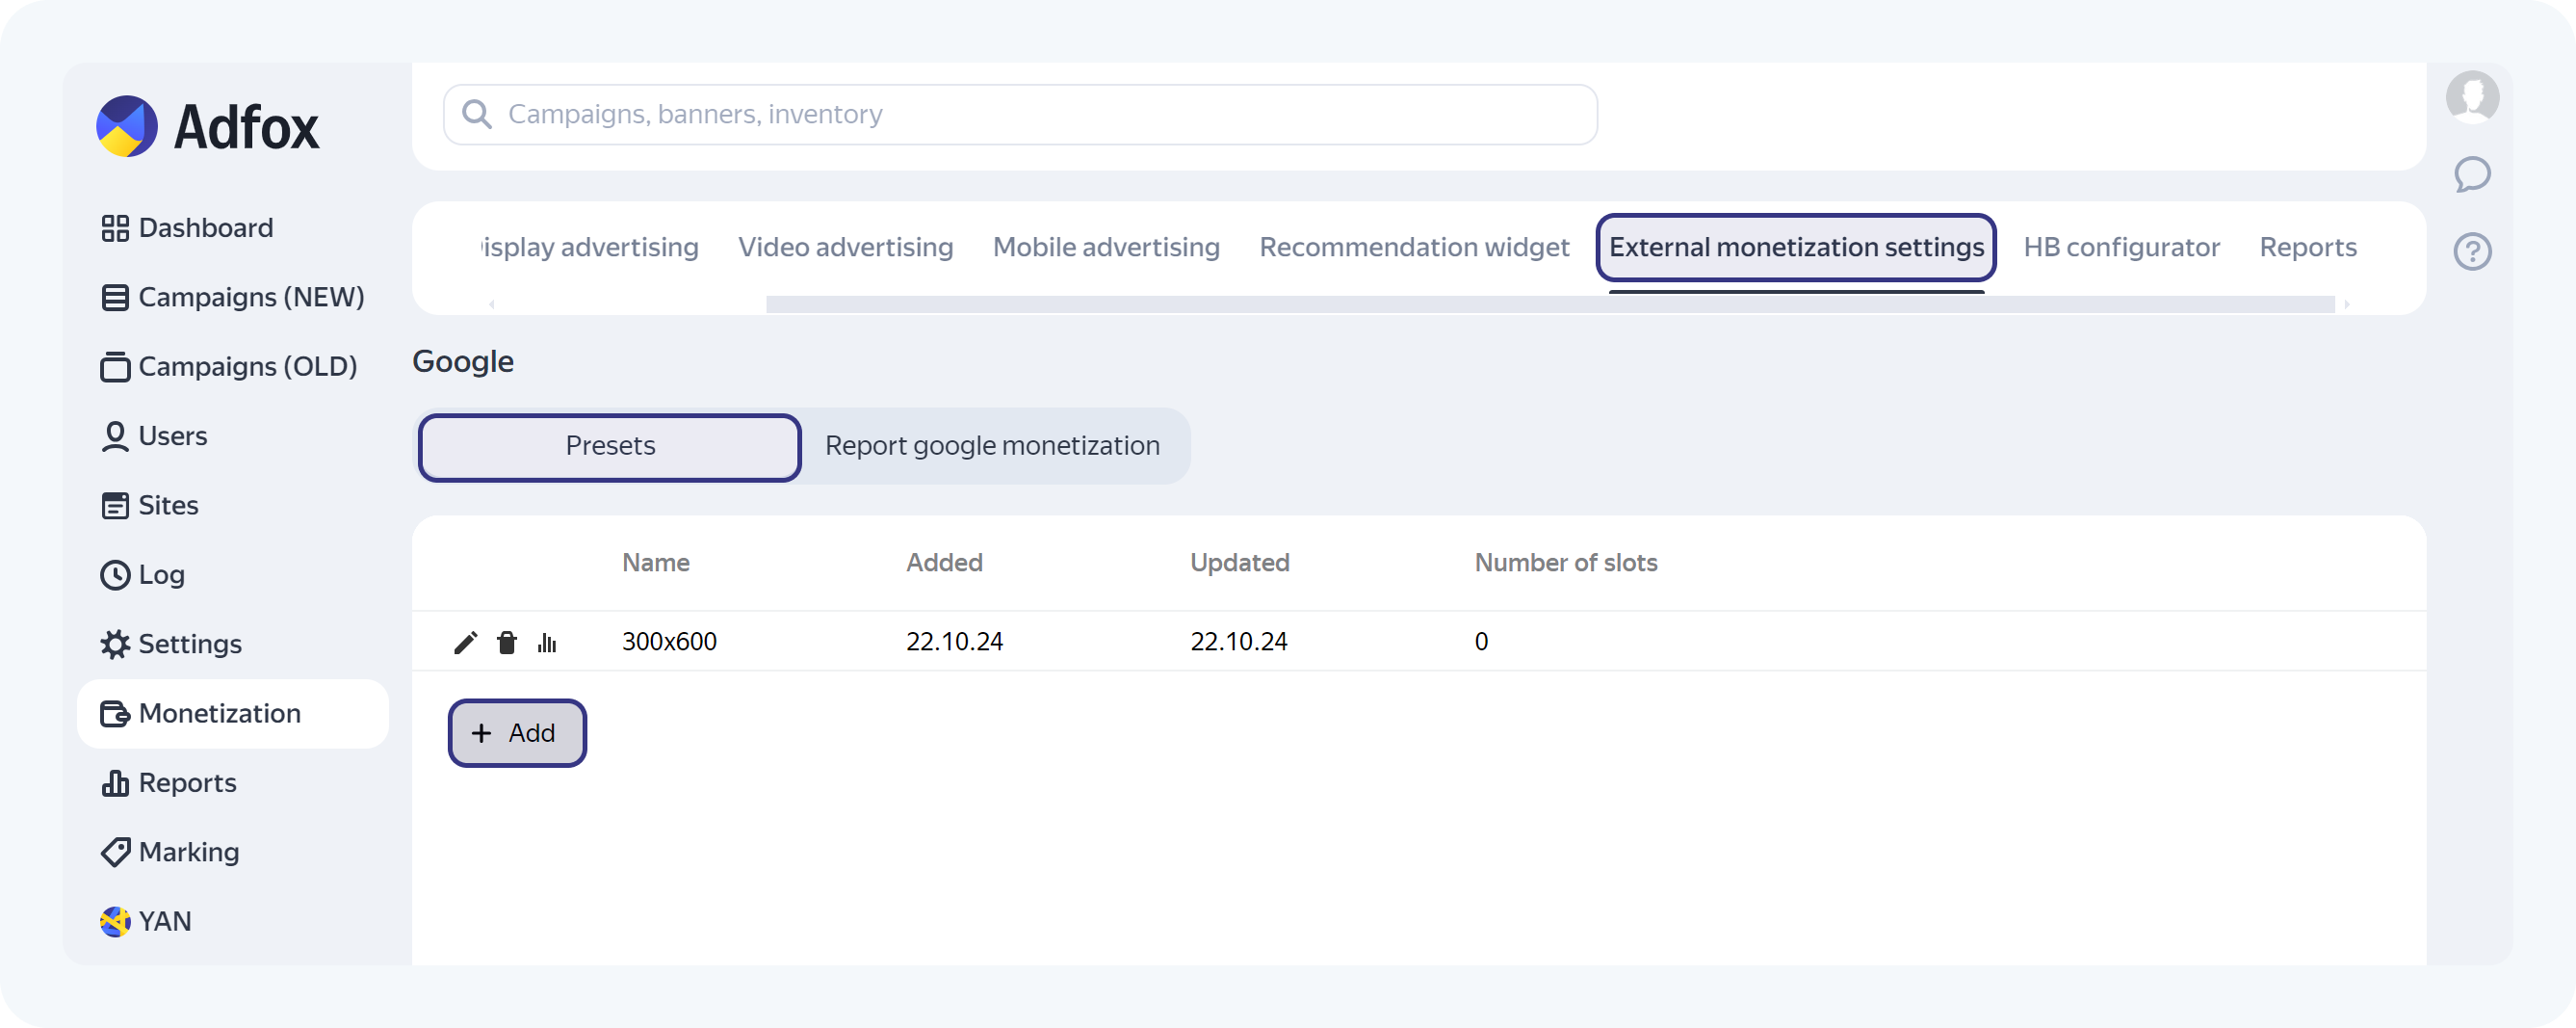
- Go to the tab Monetization → External monetization settings → Google → Presets and click + Add.
- Choose the DFP template and specify the preset's parameters:

- Set name: Set a descriptive name so you can easily identify which ad placement it's associated with.
- Dimensions: Specify the width and height of the ad placement that will be used in Google Ad Manager.
- Targeting variable name: Since you set CPM in Google Ad Manager using custom targeting, you'll need to create a Key Value in the Google Ad Manager interface and enter its name in this field.
When you create the variable in Google Ad Manager, you'll need to specify several CPM values, gradually increasing the step.
For example: 0.1; 0.2; 0.3; 0.45; 0.6; 0.75; 1; 1.25; 1.5.
You'll need these later when you create sets in Adfox. - Ad Unit: The ID of the ad unit. Create an ad unit in Google Ad Manager. Copy the
googleteg.defineslotvalue from the ad tag and paste it in this field. - Maximum number of re-requests: We recommend that you set it to 1.
- Currency: Specify the currency for your CPM floors.
- Create ad campaigns for each CPM floor in Google Ad Manager.
These ad campaigns must contain a placeholder banner. Then, if no banner is selected for display, the selection process defaults back to the campaigns configured within Adfox, excluding the campaign that uses the Google monetizer.
Here's the code to go back to Adfox campaign selection:
<script>(function() {var head = document.getElementsByTagName('head')[0] || document.body,s = document.createElement('script');s.setAttribute('type', 'text/javascript');s.setAttribute('src', 'https://yastatic.net/pcode/adfox/adfox-adx-stub.js');head.appendChild(s);})();</script> - Create a preset.
For each slot in the preset, you need to specify the CPM value. This CPM must correspond to the equivalent value you defined in Google Ad Manager for that specific slot's auction.
Click Add and enter the values you specified in Google Ad Manager. Save the changes.

Targeting variable value: The key value for which the corresponding CPM is set.
Bid Floor CPM: The CPM value from Google.
Real eCPM: The CPM value adjusted for ad unit viewability.
- Link the preset to the placement.
Go to the tab Monetization → Banner ads → Placement and add a Google ad unit by clicking the plus icon.

The interface will automatically add a campaign with Google as the demand platform and create relevant banners so you don’t have to add them manually.