How to post a panorama
- 1. Create a shipment
- 2. Set the coordinates of a panorama
- 3. Specify the direction of the panorama
- 4. Editing coordinates and direction for a group
- 5. Link panoramas
- 6. Set the horizon of the panorama
- 7. Adjust the camera position
- 8. Rename the shipment
- 9. Delete the shipment
- 10. Supplement a shipment
- 11. Send the shipment for moderation
- 12. Technical limitations
- 13. Keyboard shortcuts
To post a panorama, create a shipment and submit it for moderation. A shipment is a set of panoramic image files and their links to the map. Follow these steps:
-
Required:
2. Set the coordinates of a panorama
3. Specify the direction of the panorama
-
Optional:
-
Send:
Note the technical limitations and keyboard shortcuts for working with the service.
Before a panorama is published, it's moderated for compliance with the requirements.
1. Create a shipment
-
Log in to the service:

-
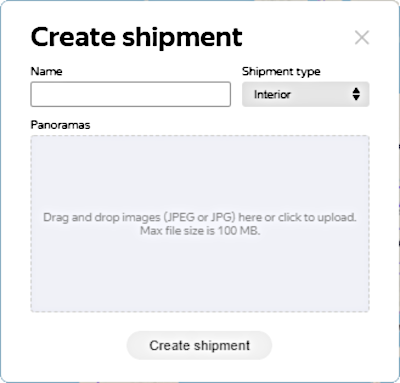
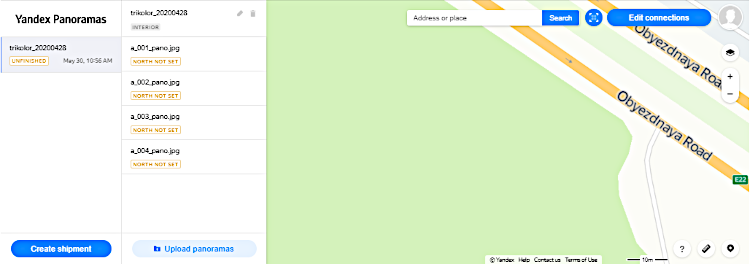
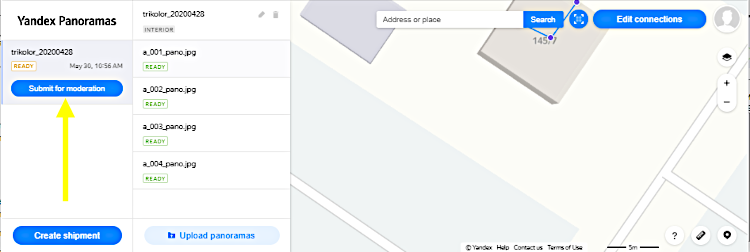
Click Create to create a shipment. The Create shipment panel opens:
-
Use this panel to set the shipment parameters:
-
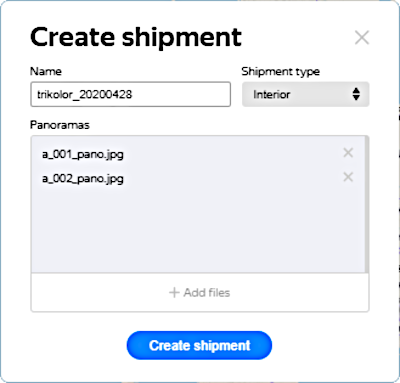
Name: Enter the shipment name.
Use Latin letters and numbers (1 to 64 characters from the sets A-Z, a-z, and 0-9).Recommended name format: organization_YYYYMMDD — [name (usually the company)_date (in YYYY-MMDD format)]. Example: kinoclub_20200106.
Shipment type: Select the desired option from the list: Street, Interior, or Aero.
-
Panoramas: Drag your panorama files here or click here and select the files in the browsing window that opens.
Note
To learn more about panorama files, see Technical requirements for _images.
Use Latin letters and numbers in file names. You may name files as you like, but make sure that each panorama has a unique name.
Note
Incorrect characters in the shipment and file names are automatically replaced with an underscore. Cyrillic letters are automatically transliterated into Latin letters.
The maximum size of each file is 100 MB.
-
-
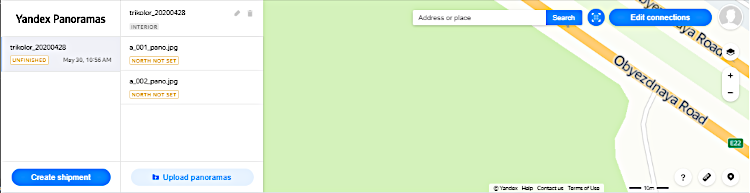
Click Create shipment. This opens a window where you can view the shipment parameters.
-
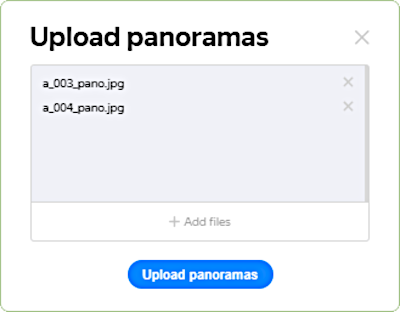
If you need to add panoramas to the shipment, click Upload and add panorama files in the Upload panoramas panel that opens:
Click Upload panoramas to add panoramas to the shipment:
2. Set the coordinates of a panorama
-
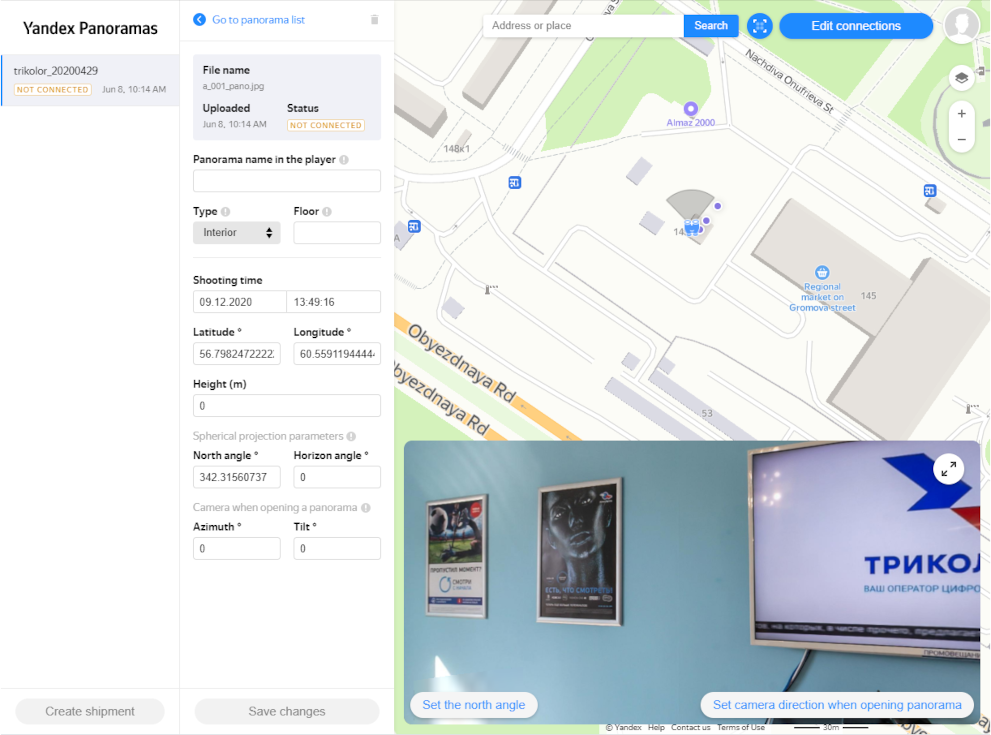
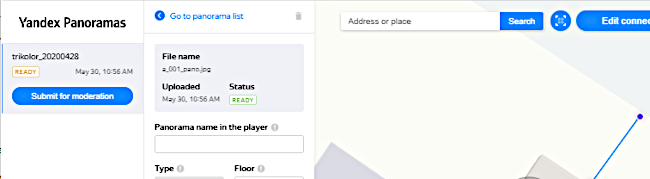
In the shipment parameter view window, click the name of the panorama file. This opens a window where you can edit the panorama parameters:
-
If the coordinates are set in the panorama's metadata (the exif attribute), before uploading it, their values will be set automatically and you won't have to fill in anything.
If no coordinates are specified in the metadata, enter the values in Latitude and Longitude. The coordinates of the point where the panorama was captured are set in whole degrees. Positive values indicate northern latitude and eastern longitude.
When the data is entered, the panorama's location on the map corresponding to the specified coordinates is displayed on the right of the screen:
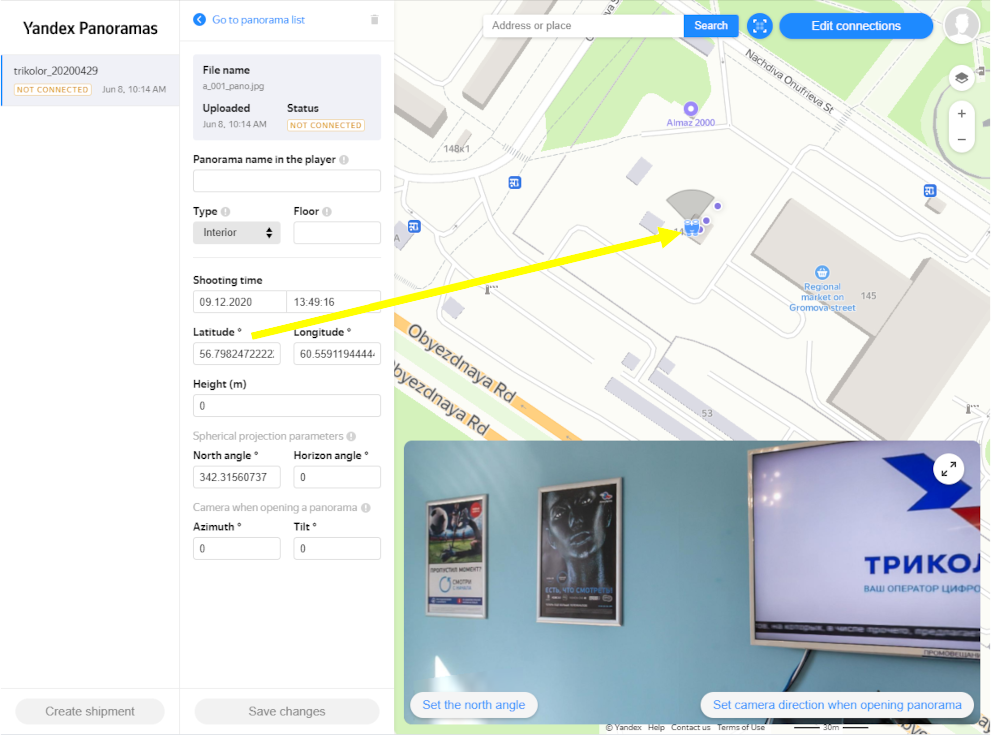
To more accurately link the panorama to the location, hover over the map and right-click on the correct location.
If the point coordinates are already set, you can change them. To do this, move the binoculars icon across the map by holding down the left mouse button. You'll see both the current (blue dot) and adjusted (binoculars) location of the point on the map at the same time:
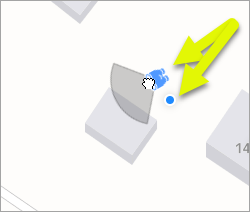
The panorama will be linked to the selected point, and the latitude and longitude values will be adjusted automatically. Then click Save changes or use the keyboard shortcuts (Ctrl + Shift + S in MS Windows or Cmd ⌘ + Shift + S in Mac OS). This saves the specified coordinates to the panorama parameters.
Note
To cancel the set value, click Cancel or press Esc.
-
Set the coordinates for each panorama included in the shipment.
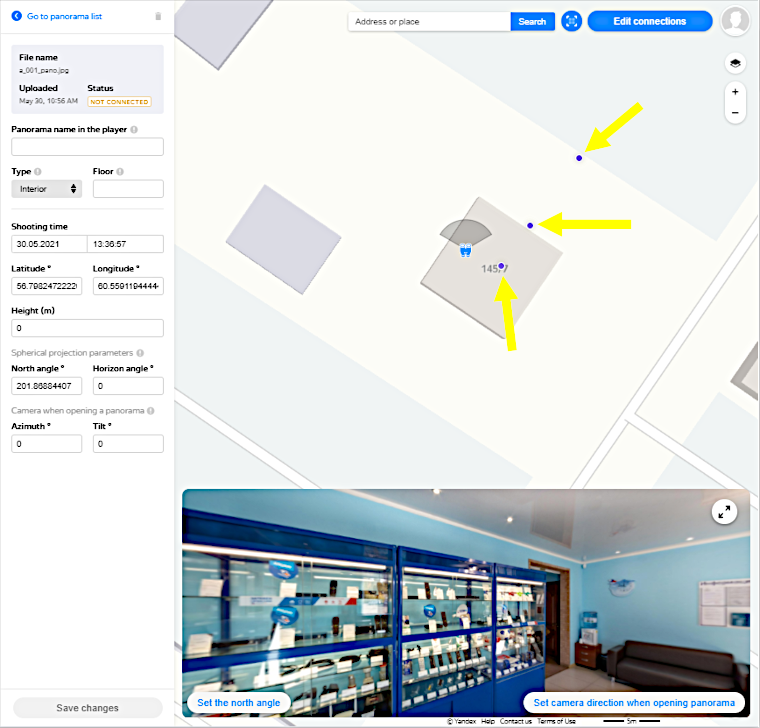
3. Specify the direction of the panorama
-
In the shipment parameter view window, click on the name of the panorama. This opens a window where you can edit the panorama parameters.
-
If the direction is set in the panorama's metadata (in XMP Photo Sphere using the PoseHeadingDegrees attribute) before uploading it, the values will be set automatically and you won't have to fill in anything.
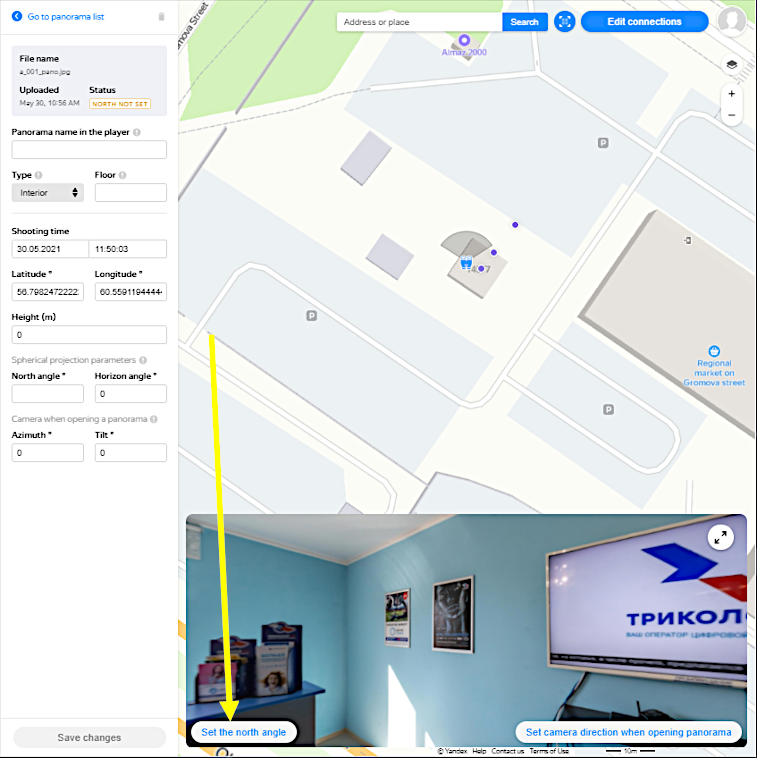
If the panorama's metadata contains no direction, set the North angle field value by moving the panorama in the lower-right part of the screen. When the panorama is oriented properly, click Set north angle:
-
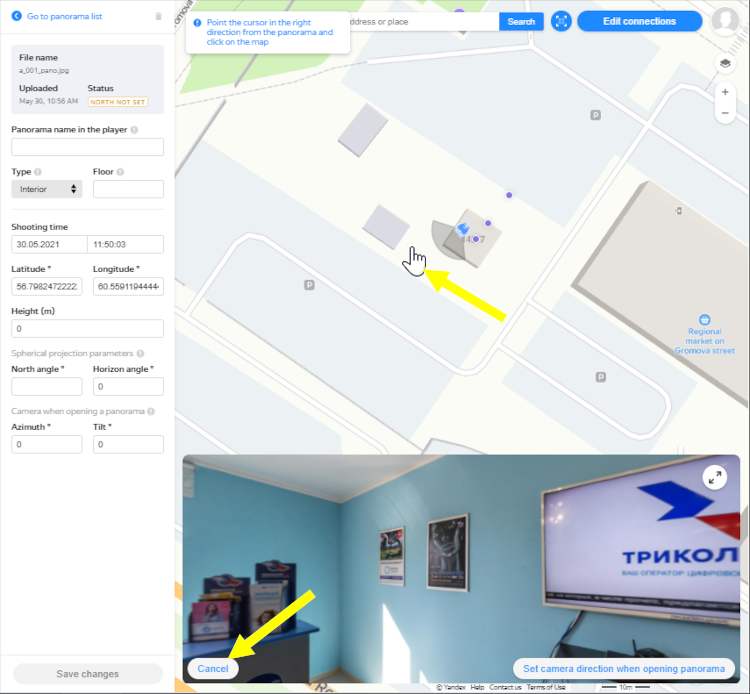
The Set north angle button turns into the Cancel button. The binoculars icon that displays the panorama's direction can now be rotated in different directions depending on the position of the cursor (mouse pointer). By moving the pointer across the map, point the binoculars (the panorama's direction) at the desired position:
-
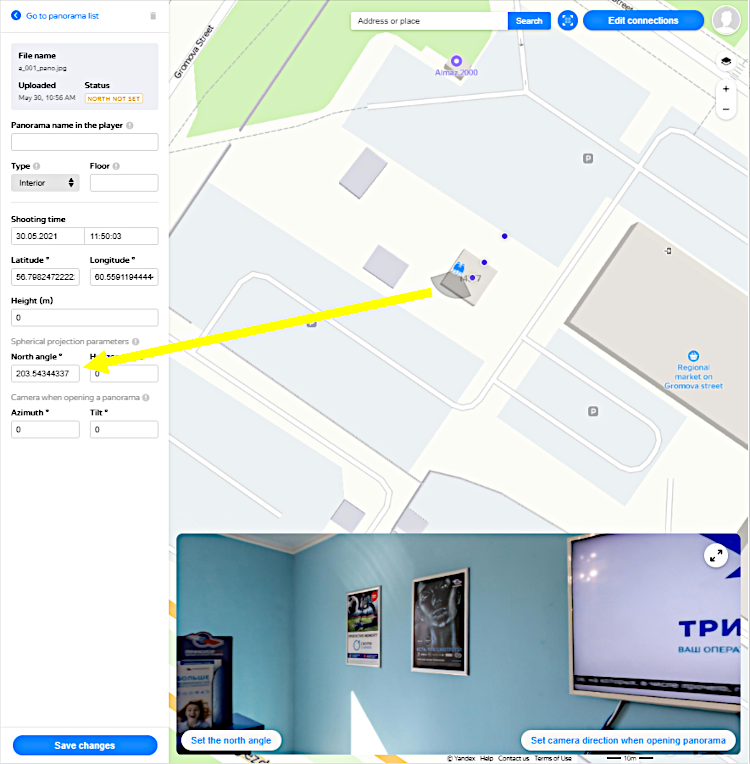
Once the binoculars icon (the panorama's direction) is in the desired position, click Save changes or use the keyboard shortcuts (Ctrl + Shift + S in MS Windows or Cmd ⌘ + Shift + S in Mac OS) to save the specified direction (North angle) in the panorama settings:
Note
To cancel the set value, click Cancel or press Esc.
This disables panorama rotation mode and returns the Cancel button to the Set north angle state.
-
Set the direction for each panorama included in the shipment.
4. Editing coordinates and direction for a group
To edit the direction or coordinates of the entire set of capture points, use group editing mode:
-
Click
 (Group actions) or use the keyboard shortcuts (Ctrl + Shift + G in MS Windows or Cmd ⌘ + Shift + G in Mac OS).
Note
In the pictures in this section, the points are linked (see 5. Link panoramas). However, you can also perform group operations with points that are not linked.
-
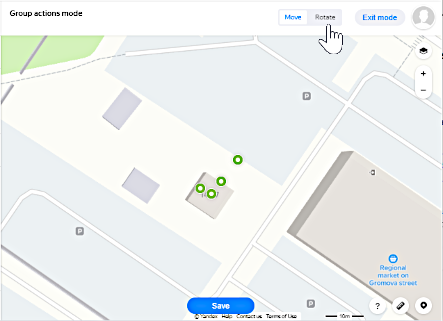
In the group editing mode window that opens, click the appropriate button to Move or Rotate the linked points:
-
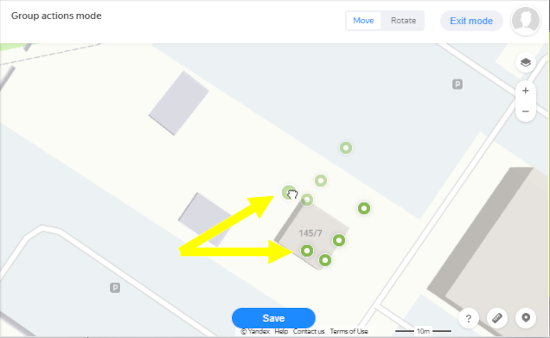
For group coordinate editing (moving capture points):
- Right-click the point on the map where you want to move a group of linked points. In this case, all the linked points are moved to the new location.
- Or left-click any of the points and drag it to the desired location. While holding down the mouse button, you may change the new location of the group of points (the points in the new location will be displayed as semi-transparent). Release the mouse button to move all the points to the new location:
-
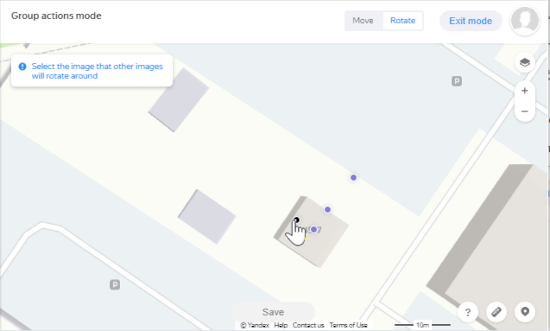
For group direction editing (rotating a group of capture points):
-
Click the point that the group of points should rotate around. The selected point color changes to black:
-
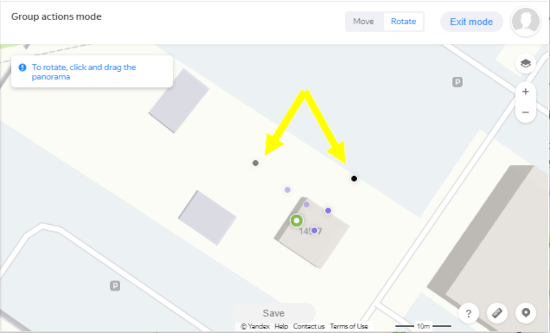
Let go of the button. The selected point is marked with
 .
. -
Click any other point and move the group of points to the desired location:
-
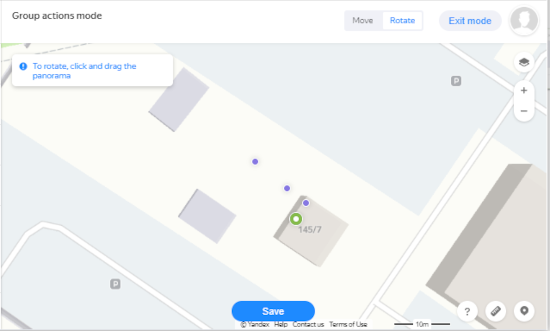
Release the mouse button to move all the points to the new location:
-
-
Click Save or use the keyboard shortcuts (Ctrl + Shift + S in MS Windows or Cmd ⌘ + Shift + S in Mac OS). This saves the changes you made to the panorama parameters.
-
To exit the mode without saving the changes, click Exit mode or press Esc.
5. Link panoramas
-
In the shipment parameter view window, the capture points are displayed as blue dots (provided that their coordinates are set):
-
Click Edit links or use the keyboard shortcuts (Ctrl + Shift + L in MS Windows or Cmd ⌘ + Shift + L in Mac OS).
This turns on link editing mode.To establish a link between the capture points, click on the first point to mark it with
 .
.Then click on the next point. The first point's marker changes to
 . The second point is marked with and with
  , and is linked to the previous point by a dashed black line (unsaved link):
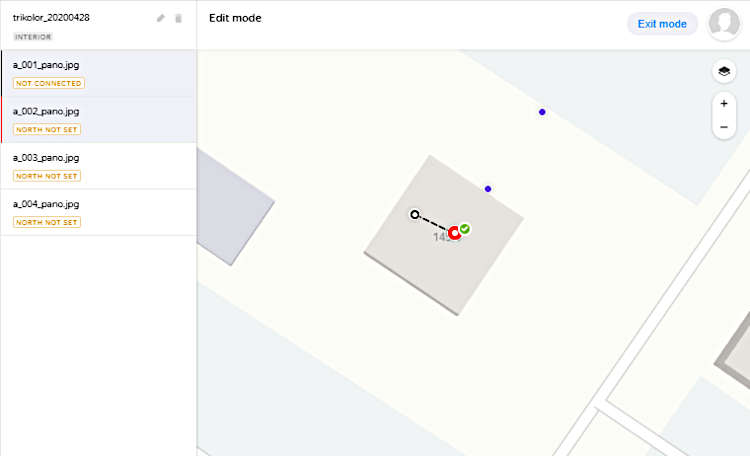
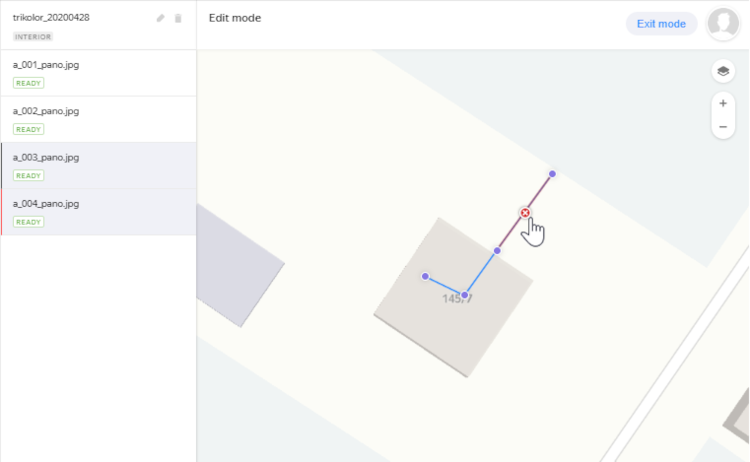
-
If the link is established correctly, click
. This saves the link, changes the dotted black line to a solid blue line, and updates the status of the linked points from Not linked to Ready:
-
If the link is incorrect, click its line. In the middle of the line, you'll see the button
 . Click it to remove the link.
To edit the entire set of linked capture points instead of a single link, use group link editing mode. -
Click Exit mode or press Esc to exit link editing mode.
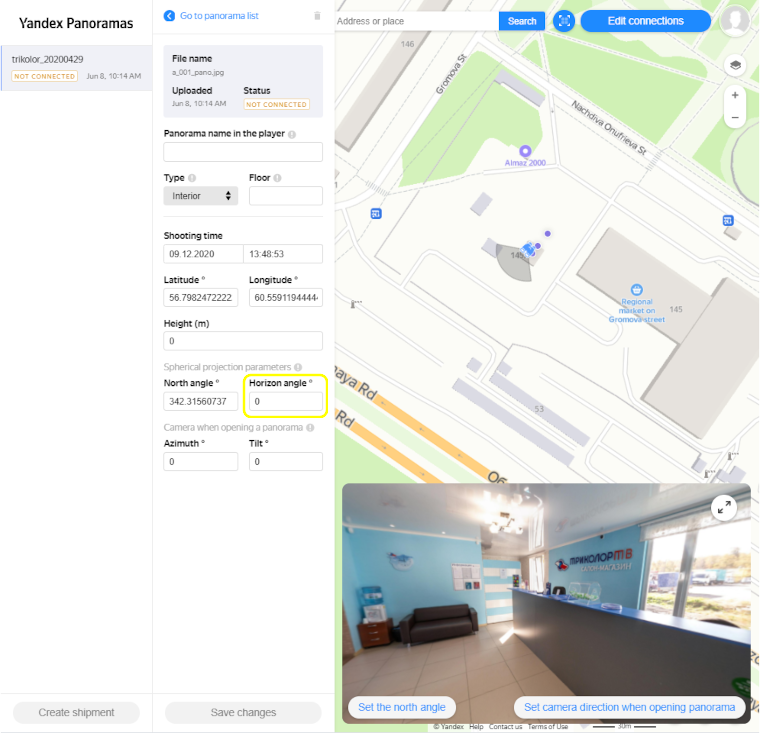
6. Set the horizon of the panorama
To set (or adjust) the angle of the panorama horizon:
-
Enter the value in Horizon angle in the Spherical projection parameters group. The panorama in the lower-right part of the screen is oriented according to the set attribute value:
-
Click Save changes or use the keyboard shortcuts (Ctrl + Shift + S in MS Windows or Cmd ⌘ + Shift + S in Mac OS). This saves the changes you made to the panorama parameters.
7. Adjust the camera position
You can adjust the camera position when opening a panorama:
-
The camera position is set by the values of the attributes of the Camera when opening panorama group: Azimuth and Slant. You can change their values either by entering the values in the attribute fields or by moving the panorama in the lower-right part of the screen.
When the panorama is oriented properly, click Set camera when opening. As a result, the corresponding angle values are substituted automatically: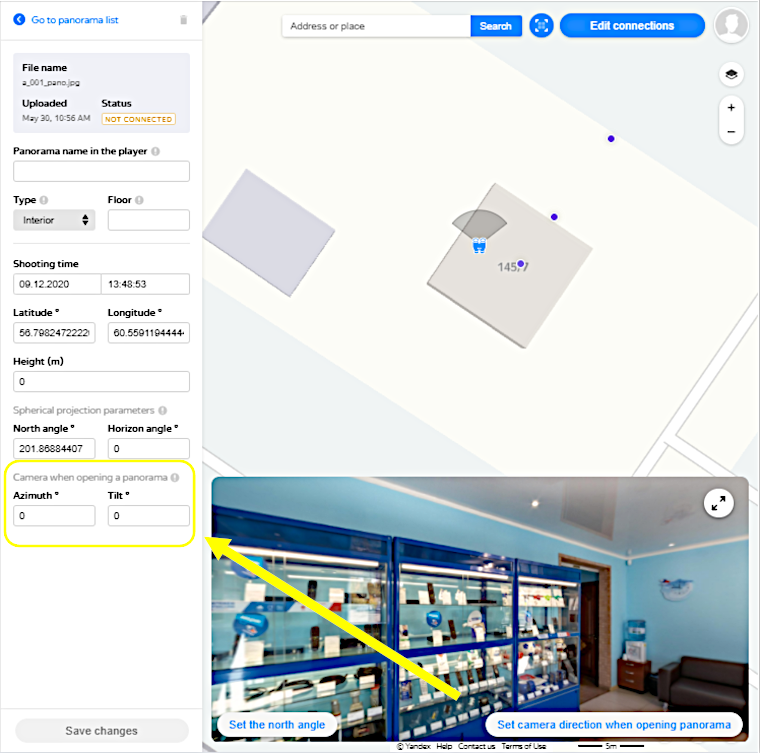
-
Click Save changes or use the keyboard shortcuts (Ctrl + Shift + S in MS Windows or Cmd ⌘ + Shift + S in Mac OS). This saves the changes you made to the panorama parameters.
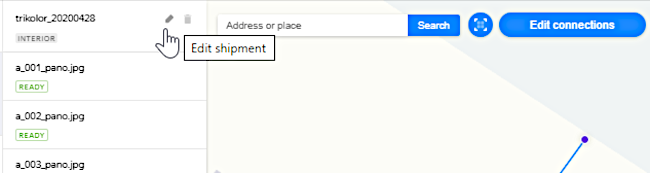
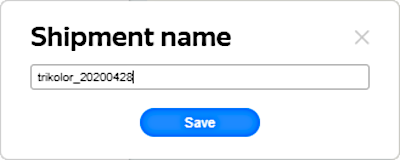
8. Rename the shipment
Before a shipment is sent for moderation, you can rename it:
-
Click Edit shipment.
In the Shipment name panel that opens, enter a new name and click Save:
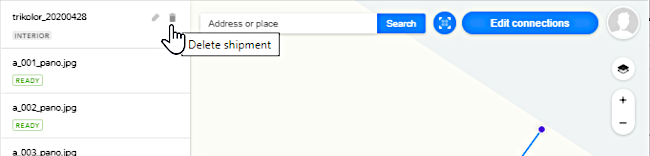
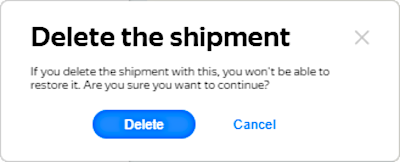
9. Delete the shipment
Before a shipment is submitted for moderation, you can delete it:
-
To delete a shipment, click Delete shipment:
In the Delete shipment panel that opens, confirm the operation (click Delete) or cancel it (click Cancel):
10. Supplement a shipment
Before a shipment is submitted for moderation, you can update the set of panoramas it includes:
-
To add a panorama to the shipment:
-
In the shipment parameter edit window, click Upload:
-
In the Upload panoramas panel that opens, add the files:
Click Upload panoramas to add panoramas to the shipment.
-
-
To remove a panorama from the shipment:
-
In the shipment parameter edit window, select the panorama you want to remove. The panorama attribute panel opens:
-
Click Delete panorama:

-
In the Delete panorama operation confirmation window, click Delete to complete the operation (or Cancel to cancel it):

-
11. Send the shipment for moderation
When all panoramas in the shipment have their coordinates, directions, and links set, the shipment status changes to Ready and the Send for moderation button becomes available:
To submit the shipment for moderation, click Send for moderation. While it's being moderated, the shipment is locked for editing.
Wait for the moderator to make a decision.
If the moderator rejects your shipment, you can edit it again. Correct the errors indicated by the moderator and resend the shipment for moderation.
If a shipment is read-only (in particular, if it has the Confirmed status), you can copy, edit, and resubmit it for moderation.
12. Technical limitations
The service can be used in the following browsers:
-
Yandex
-
Google Chrome
-
Mozilla Firefox
The service does not guarantee proper operation in Edge and Safari browsers and does not work in Internet Explorer 11 and older.
13. Keyboard shortcuts
When working with panoramas, you can use the following keyboard shortcuts:
|
Keyboard shortcuts |
Operation |
Description |
|
Ctrl + Shift + L |
Switch to link editing mode |
|
|
Ctrl + Shift + G |
Switch to group editing mode |
|
|
Ctrl + Shift + S |
Save changes in panorama attribute editing mode or group editing mode |
2. Set the coordinates of a panorama 3. Specify the direction of the panorama 4. Editing coordinates and direction for a group |
|
Esc |
Exit edit modes |
2. Set the coordinates of a panorama 3. Specify the direction of the panorama |
|
Keyboard shortcuts: |
Operation: |
Description: |
|
Cmd ⌘ + Shift + L |
Switch to link editing mode |
|
|
Cmd ⌘ + Shift + G |
Switch to group editing mode |
|
|
Cmd ⌘ + Shift + S |
Save changes in panorama attribute editing mode or group editing mode |
2. Set the coordinates of a panorama 3. Specify the direction of the panorama 4. Editing coordinates and direction for a group |
|
Esc |
Exit edit modes |
2. Set the coordinates of a panorama 3. Specify the direction of the panorama |