2.10.3. Items: additional tools
With additional tools you can enable continuous editing mode for the map, and perform group operations with map items. Such operations are only available to experts and moderators of corresponding map layers.
To enter the additional tools mode, click More tools .
.
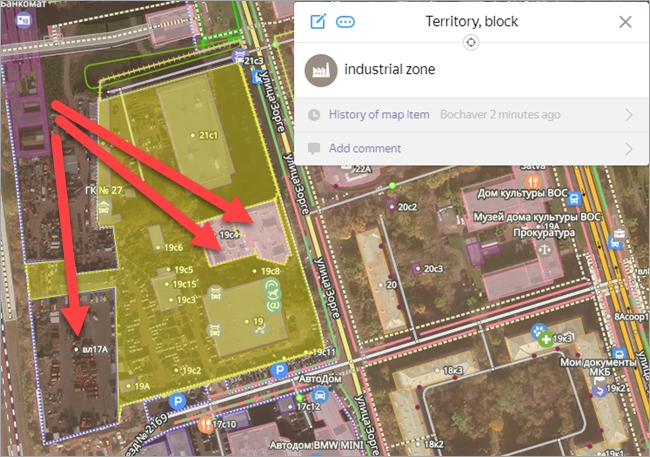
Group operations with map items are used when you need to correct the placement or attributes of several items of the same type simultaneously.
There are technical limits on the number of items that you can perform group operations with:
-
group item relocation ─ 200
-
group attribute editing ─ 200
Group operations are not available to all YME users:
-
Yandex Maps employees, experts, and moderators for the map layers in question are able to make group attribute edits.
-
Yandex Maps employees and moderators for the map layers in question can do group relocations.
2.10.3.1. Continuous editing mode
You can use continuous editing mode to:
- Go to item editing by clicking the item on the map.
- Start creating another item of the same category after saving a new item, similarly to using the following keyboard shortcut: Shift + Ctrl + A —
Save an item and start creating a similar one
). For more information, see 2.2.8. Keyboard shortcuts.
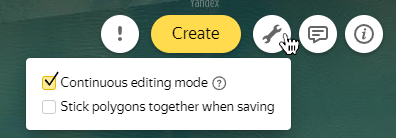
To turn on the mode, you can use the hot keys Alt + C or:
-
Click More tools
. -
In the menu that opens, select the Continuous editing mode checkbox:
2.10.3.2. Group item relocation
Group item relocation is used when you need to correct the placement of items after satellite images are updated, for example.
Group relocation can only be used for places (Locations, Addresses, Parking lots, etc.) and simple polygonal items (Buildings, Territories, etc.).
To move a group of items:
-
Click More tools
.Select Group relocation in the menu that opens.
An information panel and local toolbar will open:
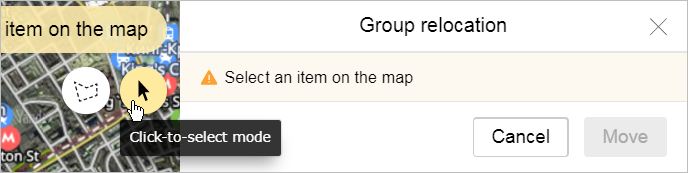
-
Click the appropriate button on the local panel and choose the "highlight map items being moved" mode:
 (Area selection mode). In this mode, you can set an area on the map and all places and simple polygonal items that are located within the borders of that area will be selected. Create regions in a similar way to other simple polygonal map items.
 (Press selection mode). In this mode, you can highlight items by clicking on them.
 -
Select the items that you want to move. A list of them will appear in the information panel:

The highlighted items in the list are grouped by category. Every line in the list displays buttons that you can use for editing:
 — Only leave map items of this category in the list.
 — Delete this category from the list of map items.
 -
After you've put together your list of items to move, click Move and drag the items to the appropriate place (by holding down your mouse button).
-
Click Save. The items will be saved in their new locations.
2.10.3.3. Group attribute editing
Group attribute editing is used to correct the attribute values for several items. For example, you can add attributes to sections that belong to the same road, etc.
You can only use group attribute editing with buildings, sections of road, territories, and parking placemarks.
To edit a group of attributes:
-
Click More tools
.In the menu that opens, select Attribute editing under Group operations.
An information panel and local toolbar will open:
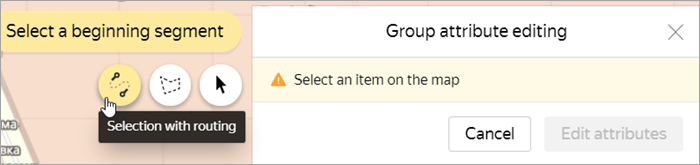
-
Click the appropriate button on the local panel and choose the "highlight map items to edit" mode:
 (Routing selection mode). This mode lets you edit the attributes of road sections placed in a sequence (which makes up a road). The tool is only used for class 1-7 roads. Select items by left-clicking the road sections at the start and end of the road. The sections between them will be added in automatically.
(Area selection mode). In this mode, you can set an area on the map and all the buildings, road sections, territories, and parking placemarks whose attributes can be edited in that area will be selected. Create regions in a similar way to other simple polygonal map items.
(Press selection mode). In this mode, you can highlight items by clicking on them.
(Routing selection mode). This mode lets you edit the attributes of road sections placed in a sequence (which makes up a road). The tool is only used for class 1-7 roads. Select items by left-clicking the road sections at the start and end of the road. The sections between them will be added in automatically.
(Area selection mode). In this mode, you can set an area on the map and all the buildings, road sections, territories, and parking placemarks whose attributes can be edited in that area will be selected. Create regions in a similar way to other simple polygonal map items.
(Press selection mode). In this mode, you can highlight items by clicking on them. -
Select items whose attributes need to be edited. A list of them will appear in the information panel:
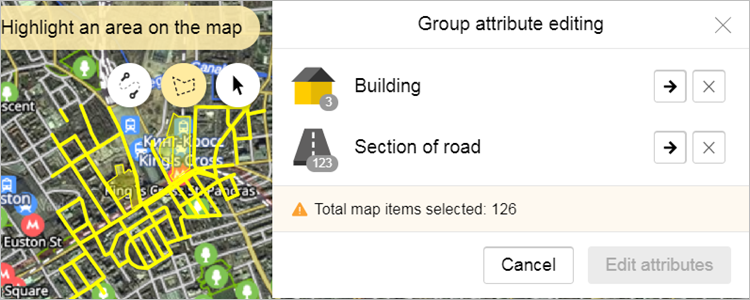
The highlighted items in the list are grouped by category. Every line in the list displays buttons that you can use for editing:
— Only leave map items of this category in the list.
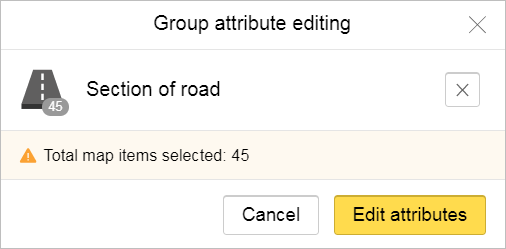
— Delete this category from the list of map items.To perform this operation, the list should only contain items from a single category (because items have different attributes depending on the categories):
Note
When using routing mode, only items of a single type (road sections) can be selected.
-
After you have put your list together, click Edit attributes.
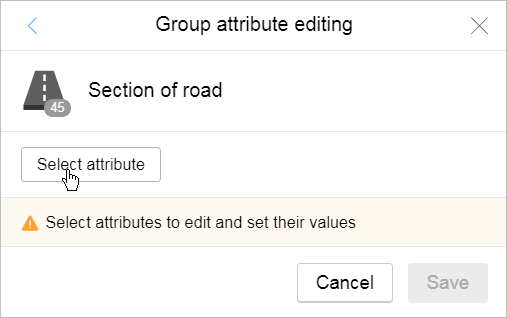
Select the appropriate attributes from the list in the panel that opens:
Note
In group editing mode, only the selected attributes will be changed; related attributes won't be automatically changed.
For example, during regular editing, changing the road section class from
Roads of minimal significance (class 7)
toPedestrian and bike paths (class 10)
automatically disables speed limit attributes and motor vehicle accessibility. However, this doesn't happen during group attribute editing, and road sections with the changed classPedestrian and bike paths (class 10)
retain enabled speed limit attributes and motor vehicle accessibility.So in case of group editing, select all attributes whose values should differ from the current ones.
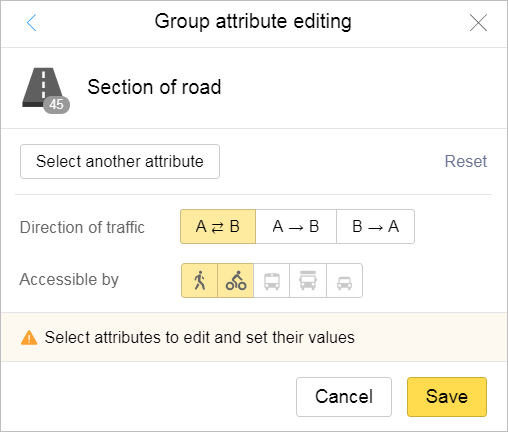
The fields for editing the selected attributes will appear at the bottom of the panel:
-
Enter the values for the selected attributes:
-
Click Save. The attribute values will be saved.
2.10.3.4. Item geometry synchronization
The Object geometry synchronization tool only applies to items on indoor maps (and is only available to users who work with indoor maps).
The tool provides a uniform (synchronized) placement of icons at different levels of an indoor map. If necessary, it can be applied to items such as elevators, atriums, and public
technical rooms.
The tool is only available in indoor map edit mode.
To use "Object geometry synchronization":
-
Click More tools
.In the menu that opens, select Object geometry synchronization under Group operations.
-
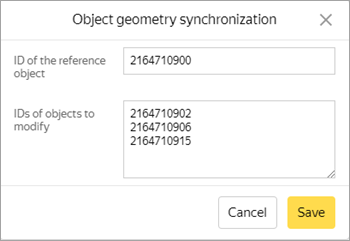
In the Object geometry synchronization panel that opens:
-
In the Reference object ID field, set the ID of the object whose position is to be used as the reference: for example, the ID of an elevator at the first Indoor map level.
Note
For more information about object IDs, see 2.2.1.3. Search by object ID.
-
In the IDs of objects to modify field, set the ID of an object or objects whose position is to be synchronized: for example, the IDs of elevators at the second and third Indoor map levels:
-
-
Tap Save. The location of objects gets synchronized.
2.10.3.5. Stick polygons together when saving
This mode automatically adjusts the geometry of created objects (similar to snap-to mode available when drawing polygonal items). In this mode, the vertexes of the new item snap to neighboring polygons that were drawn earlier. Sticking mode is implemented when saving the drawn items.
To enable this mode:
-
Click More tools
. -
In the menu that opens, select the Stick polygons together when saving checkbox.
If the mode doesn't work properly with your items, you can disable it. To do this, uncheck the checkbox.
2.10.3.6. Blocked users
This tool opens a list of blocked users. It is only available to Yandex Map Editor moderators.
2.10.3.7. Subtracting polygonal items
Polygonal objects are subtracted to exclude them from other polygonal objects. For example, to exclude buildings from a territory.
For subtracting an object:
-
Click More tools
.In the menu that opens, choose Group operations → Subtract polygonal objects.
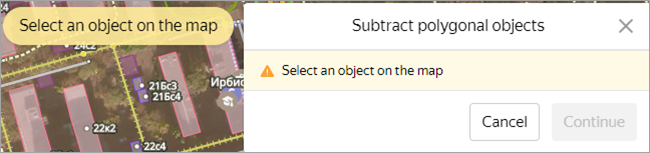
That opens an information panel:
-
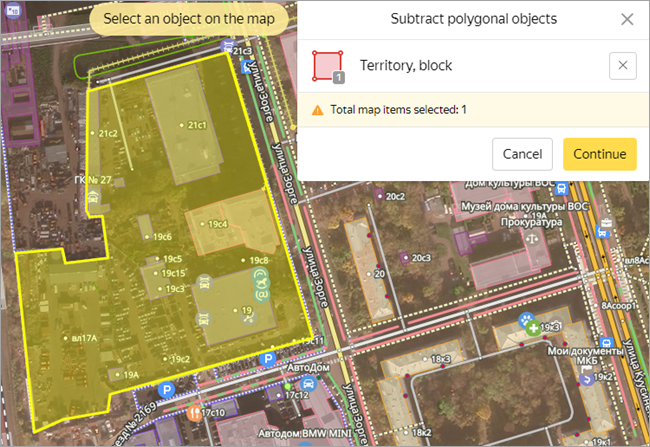
Choose the source object (the one you're subtracting from). The panel will display its features:
-
Click Continue.
Click the button on the local panel and choose the mode for selecting subtracted items:
(Area selection mode). In this mode, set an area on the map to select all the simple polygonal objects located within it. Areas are created just like other simple polygonal objects.
(Press selection mode). In this mode, you can highlight items by clicking on them.Choose the objects to subtract. The information panel will display their features and quantity:
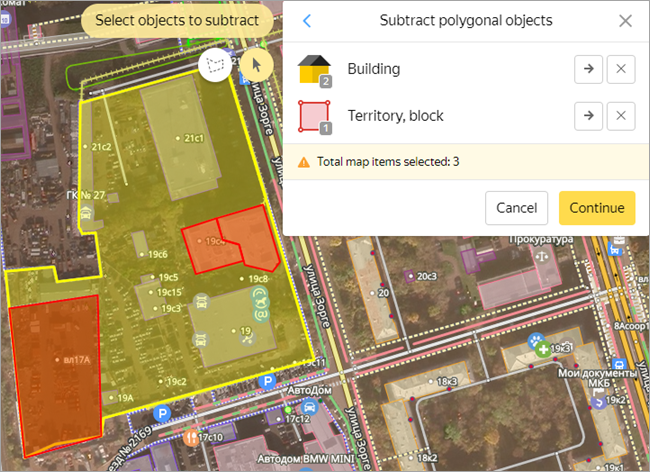
The highlighted items in the list are grouped by category. Every line in the list displays buttons that you can use for editing:
— Only leave map items of this category in the list.
— Delete this category from the list of map items. -
After the list of subtracted objects is ready, click Continue.
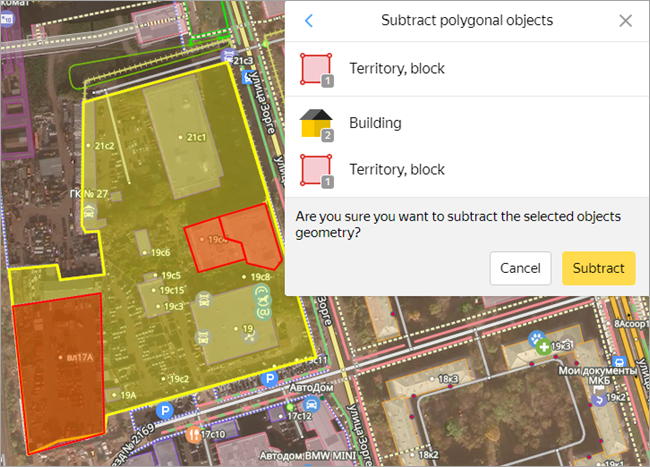
The panel will display a confirmation request.
Click Subtract:
-
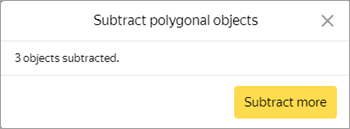
The panel will display the results of the operation and offer to continue subtracting polygons:
-
The selected objects will be subtracted (removed) from the polygon of the object the operation was applied to: