3.19.4. Linear markings
Alert
At present, you can't use multi‑markings to edit or create items.
Draw linear markings after the roadbed and polygonal markings. Draw linear markings over the roadbed using linear items.
All markings must comply with Table A.1 Appendix A of the GOST standard for road markings. Pay attention to the line thickness, gaps between lines, color, and direction.
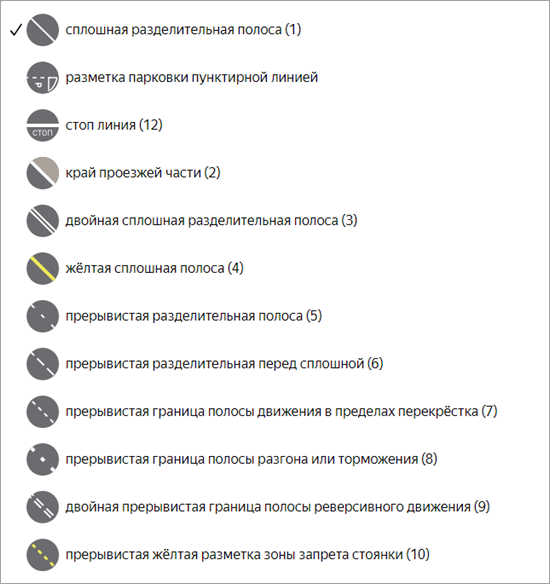
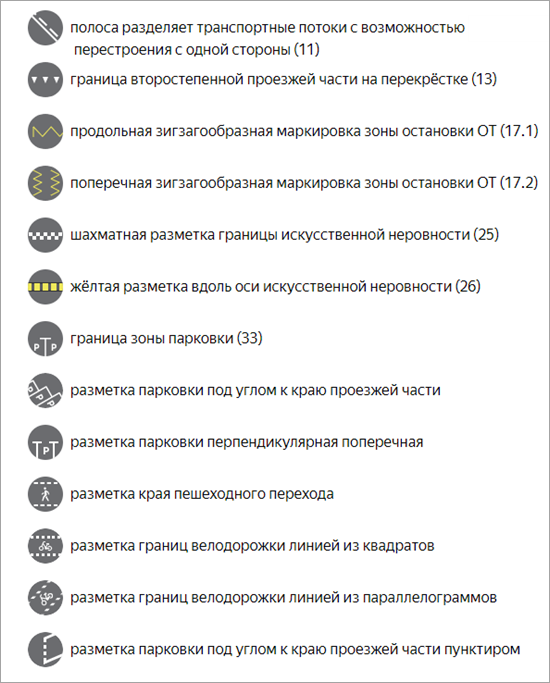
The following types of linear markings are available on the map (the number in parentheses next to each type corresponds to the relevant GOST clause in Table A.1):
-
Solid dividing line (1).
-
Perpendicular parking lines.
-
Angled roadside parking lines.
-
Checkered speed bump marking (25).
-
Stop line (12).
-
Broken boundary of a traffic lane within an intersection (7).
-
Broken dividing line before a solid line (6).
-
Broken dividing line (5).
-
Edge of the roadway (2).
-
Boundary of the secondary roadway at an intersection (13).
-
Broken acceleration or deceleration lane boundary (8).
-
Lane divides traffic flows and allows for a lane change in one direction (11).
-
Longitudinal zigzag marking of a public transport stopping zone (17.1).
-
Yellow line along a speed bump (26).
-
Solid yellow line (4).
-
Dotted stop line (UAE).
-
Broken line indicating parking.
-
Parking zone boundary (33).
-
Dotted, angled roadside parking lines.
-
Solid double dividing line (3).
-
Broken yellow line indicating a no parking zone (10).
-
Square bike lane marking.
-
Perpendicular zigzag marking of a public transport stopping zone (17.2).
-
Rumble strips.
-
Broken double reverse lane boundary (9).
-
Pedestrian crossing marking.
-
Parallelogram bike lane marking.
-
Angled roadside parking lines (dashed).
-
Zigzag dividing line (UAE).
-
Speed bump (UAE).
-
No stopping.
-
Dotted double stop line (SA).
-
Public transport stop (SA).
You can draw linear markings along the boundary of the roadbed or polygonal markings.
-
If an item overlaps a roadbed with a level other than [0;0] or a
Parking
roadbed, link it to that roadbed. -
If a roadbed with a level other than [0;0] is split, its linear markings must be split as well.
-
Markings are non‑planar, meaning you shouldn't split them at intersections.
-
At points where one marking transitions into another, determine the transition boundary based not only on the size of the dashes but also on the size of the gaps between them.
-
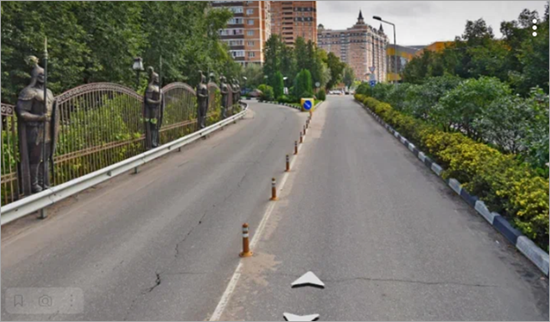
If linear markings run directly under dividing road posts, draw both items (physical traffic island and linear markings).
Example
-
In areas where linear markings must align with the boundaries of the roadbed or polygon markings, use Snapping mode (see 2.7.3.1.1. General drawing techniques).
-
If the markings for a parking pocket ignore any protrusions in the pocket regardless of their direction, don't draw these protrusions.
Examples
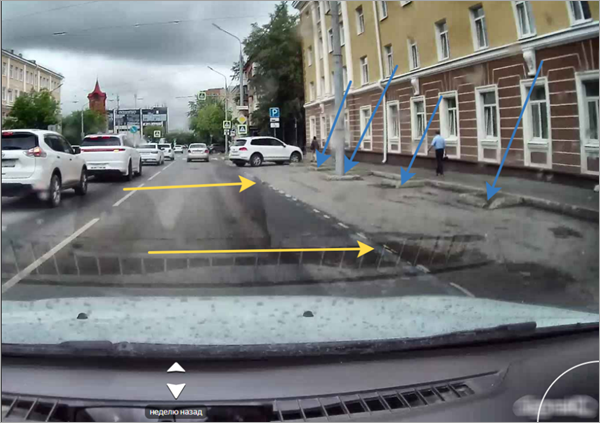
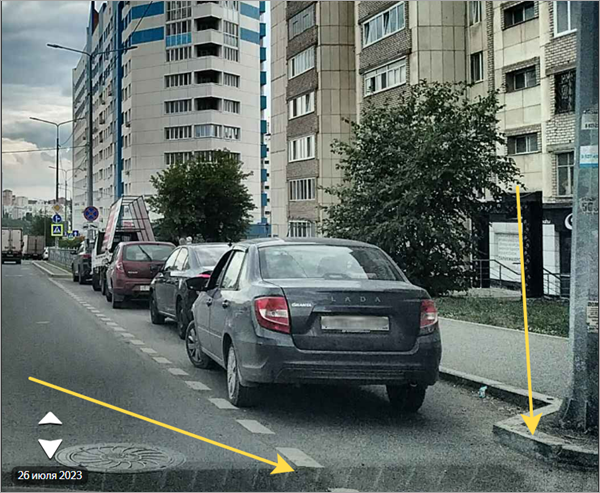
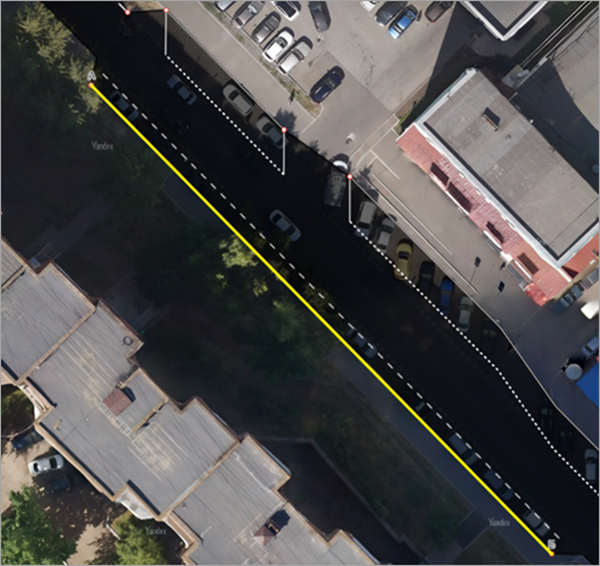
-
The boundaries between dashed markings are defined by the combined length of the dash and the gap, with each gap assigned to a specific marking.
Note
The absolute dash length for the same marking type may vary across different countries — choose the marking type based on the ratio of dash length to gap length.
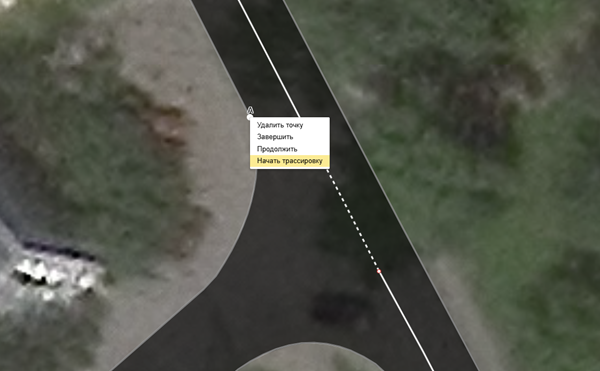
You can draw linear markings along the roadbed boundary using the Trace tool:
-
Right-click a starting point.
-
In the context menu, select Start trace.
-
Move the cursor smoothly along the edge from the starting point to the end point.
-
Left-click to select the end point.
-
Check that the line was rendered correctly.
3.19.4.1. Solid dividing line (1)
Don't confuse this type with a shoulder.
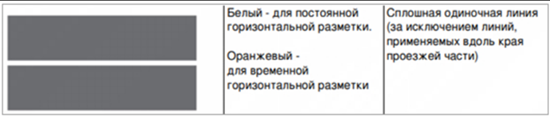
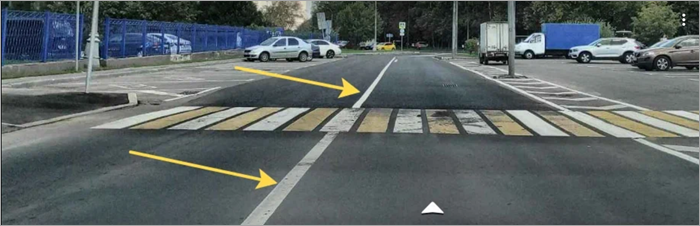
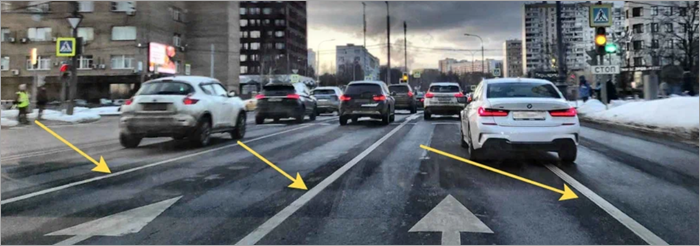
Use it to draw solid markings that separate traffic moving in opposite directions or to indicate lane boundaries.
Note
In some regions, solid yellow lines indicate permanent rather than temporary markings. Before drawing an item, check the intended purpose of the marking in the given region.
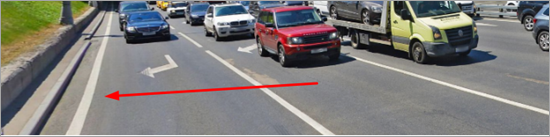
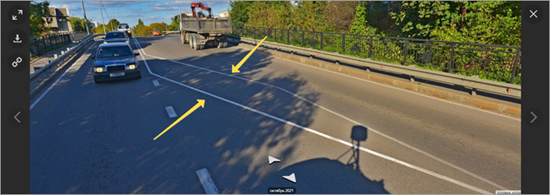
3.19.4.2. Edge of the roadway (2)
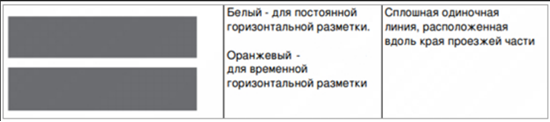
Indicates the edge of the roadway or the boundaries of roadway sections where entry is prohibited. The physical line may be the same thickness as or slightly thicker than a single solid line.
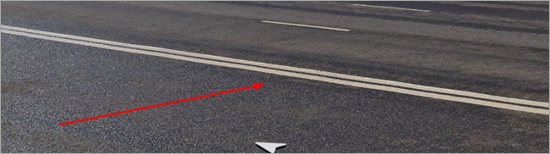
3.19.4.3. Solid double dividing line (3)
Used when the distance between the lines matches the standard spacing defined in GOST — approximately the width of a single solid line.

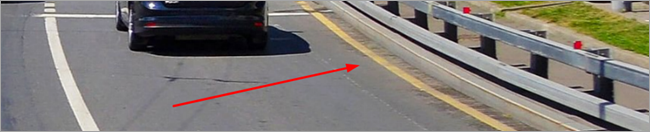
3.19.4.4. Solid yellow line (4)
Similar to the Edge of the roadway
marking but yellow. Use this marking type to indicate a no-parking zone in Russia.

3.19.4.5. Broken dividing line (5)
This linear marking type corresponds to the main dashed line along a multi‑lane road. It's characterized by short dashes with long gaps.

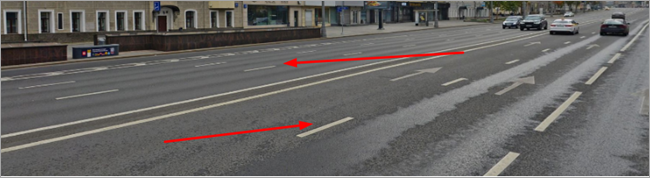
You can also use broken dividing lines (5) as linear markings between bike lanes.
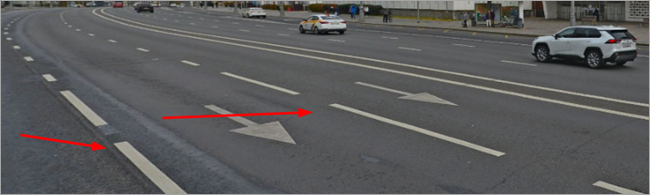
3.19.4.6. Broken dividing line before a solid line (6)
Use this type to transition from a Broken dividing line (5)
near an intersection. It's characterized by long dashes with short gaps.

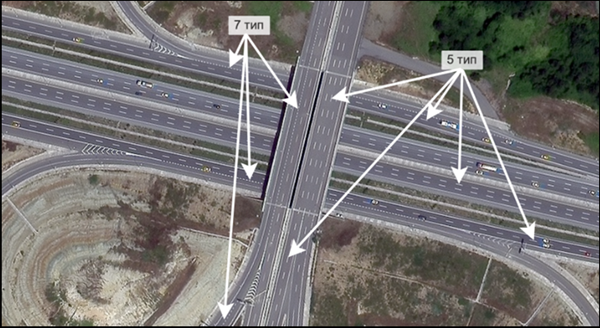
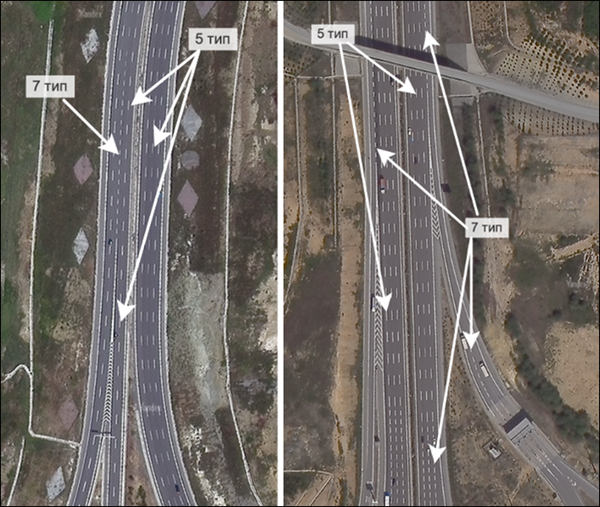
3.19.4.7. Broken boundary of a traffic lane within an intersection (7)
Use this type to indicate route trajectories at an intersection. It's characterized by short dashes with short gaps.

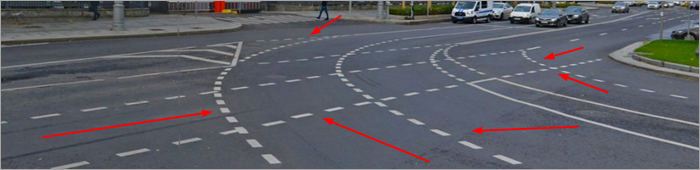
In dashcam images and panoramas, these markings appear smaller than other types of dashed markings.
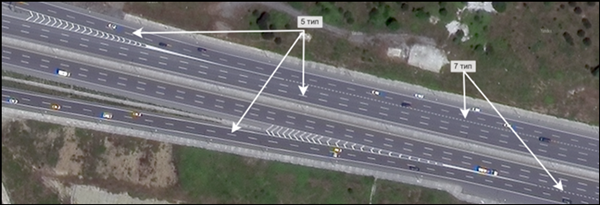
Example 1
Markings before an exit (often drawn before a solid line and the edge of a traffic island):
Example 2
Markings near toll booths:
3.19.4.8. Broken acceleration or deceleration lane boundary (8)
Used on highways at points where the exit lane meets the main road. It's characterized by short dashes with short gaps and increased thickness.


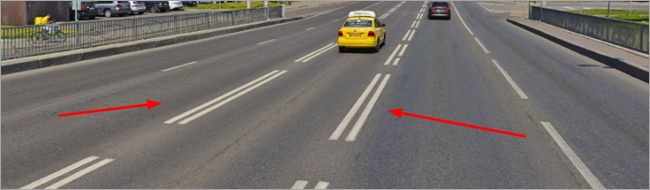
3.19.4.9. Broken double reverse lane boundary (9)
Use this type to indicate reverse traffic lanes.

3.19.4.10. Broken yellow line indicating a no parking zone (10)
Broken yellow line where the length of the dash equals the distance between the dashes (1:1 ratio).

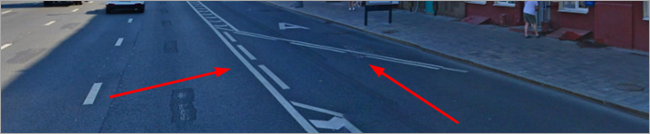
3.19.4.11. Lane divides traffic flows and allows for a lane change in one direction (11)
A combination of a solid and a dashed line indicating that a lane change is allowed only in one direction. For this type, the drawing direction is critical: the dashed line must be on the left when moving from point A to point B.

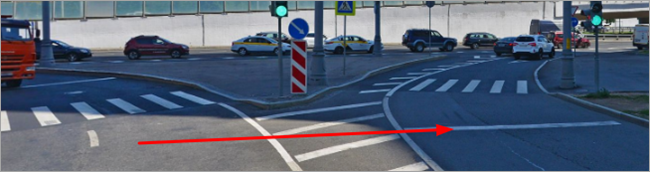
3.19.4.12. Stop line (12)

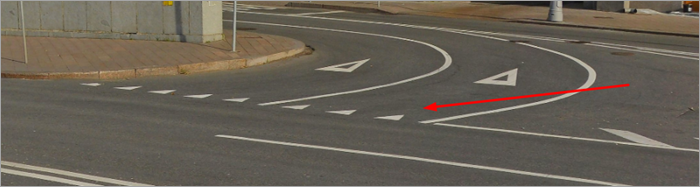
3.19.4.13. Boundary of the secondary roadway at an intersection (13)
For this type, the drawing direction is critical: the triangle vertices must be on the left when moving from point A to point B.

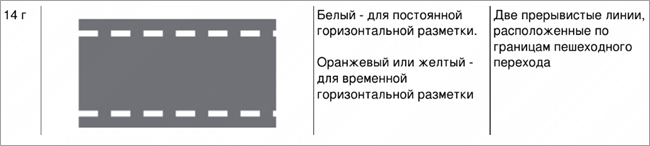
3.19.4.14. Pedestrian crossing marking (14D)
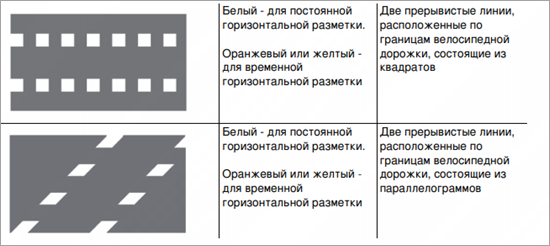
3.19.4.15. Square and parallelogram bike lane marking (15.1–3.15)
3.19.4.16. Longitudinal and perpendicular zigzag marking of a public transport stopping zone (17.1–17.2)
Use this type to draw public transport stops along the edge of the roadway. For this type, the drawing direction is critical: the roadbed must be on the left when moving from point A to point B.
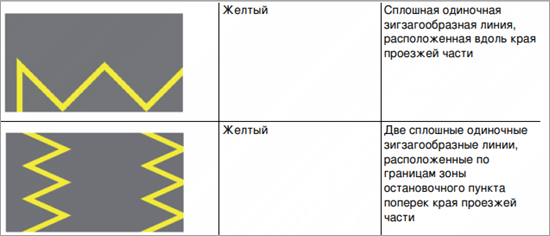
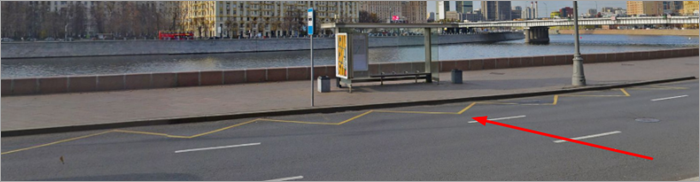
You can draw type 17.1 linear markings over another linear marking type when the overlap physically exists on the road.
3.19.4.17. Checkered speed bump marking (25)
Use this type to draw speed bumps as they appear on the physical road.

3.19.4.18. Yellow line along a speed bump (26)


3.19.4.19. Parking zone boundary (33)
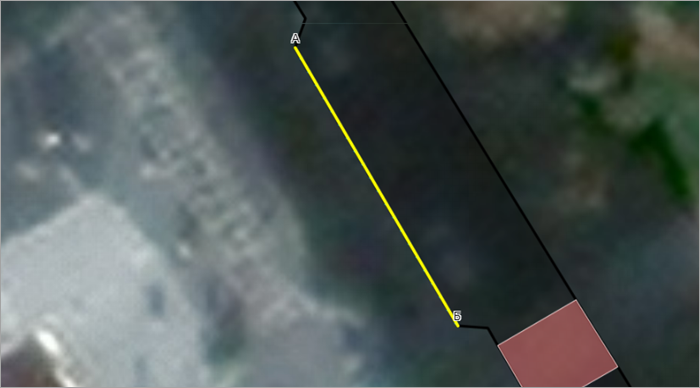
Use this type to draw parking zones along the edge of the roadway. For this type, the drawing direction is critical: the roadbed must be on the left when moving from point A to point B. The markings will appear in color to the left of the A–B line, perpendicular to its orientation.
Alert
If the base of the parking zone is visible in the image, set the Show basis attribute when drawing linear or polygonal parking:

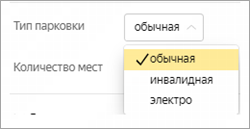
All parking types have two attributes: type and number of spaces. These populate automatically based on the item's length when saving.

Draw parking spaces for persons with disabilities and electric vehicles as separate linear items of the appropriate type. Set the number of spaces for such items manually. Note that you don't need to draw point marking icons for accessible parking zones and electric charging stations.
Warning
-
When the type or geometry of a linear item changes, manually entered values may reset. Always verify that the number of parking spaces remains correct after editing an item.
-
For transitions between standard parking zones and other items — for example, accessible parking zones — ensure the transition points align perfectly. It's best to create one shared item, then split it at the origin of the boundary dash. Non-standard parking zones must not have an undefined number of spaces.
In certain cases, you can overlap markings, provided they match the physical markings on the road — for example, dashed and accessible parking markings may overlap.
Example
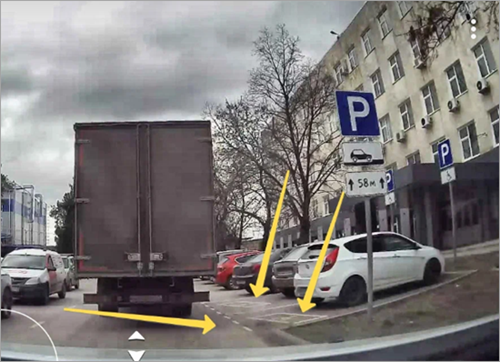
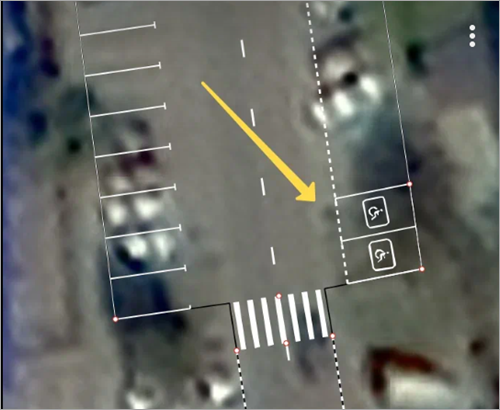
When marking a parking zone at an angle to the roadway edge, set the angle of the parking markings using an auxiliary segment originating from point A. You can adjust the angle by dragging the free end of this segment.
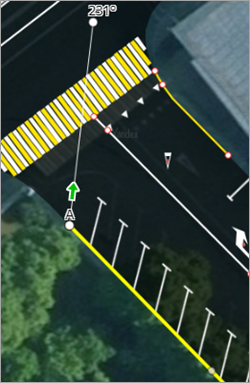
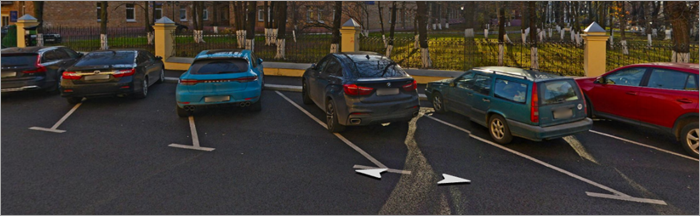
Note
If a parking pocket uses this marking in combination with the Angled roadside parking lines marking, make sure their angles align.
Example

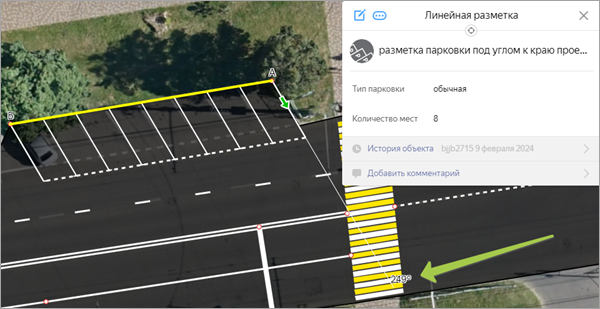
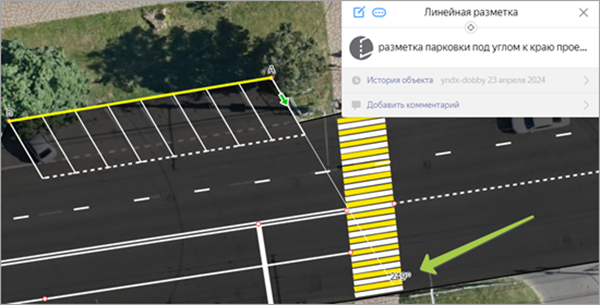

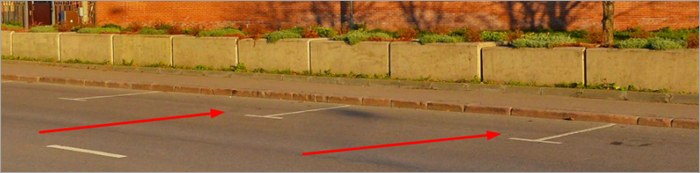
Draw linear parking markings from the first dash of the parking space to the last, excluding the "caps". This applies to all mapped parking zone types.
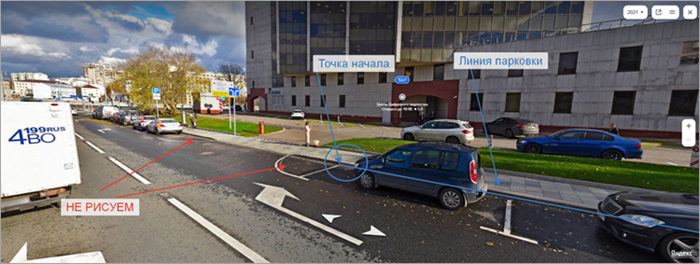
Note
"Caps" are the edges of parking zones that have a distinctive shape and don't have internal hatching.
Example
A rounded parking pocket without internal hatching:
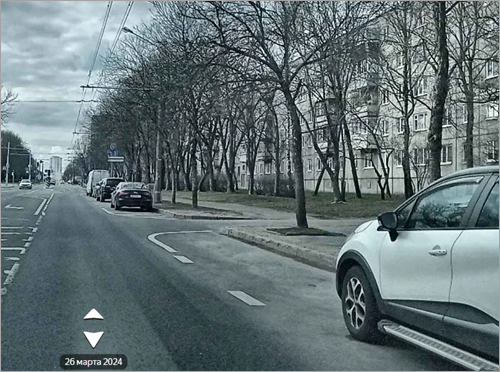
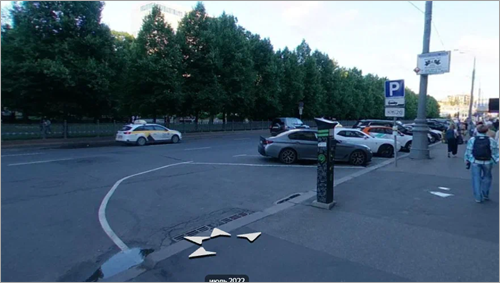
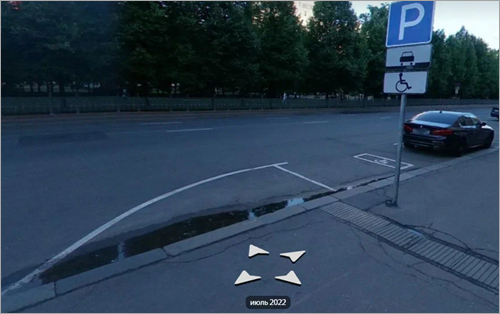
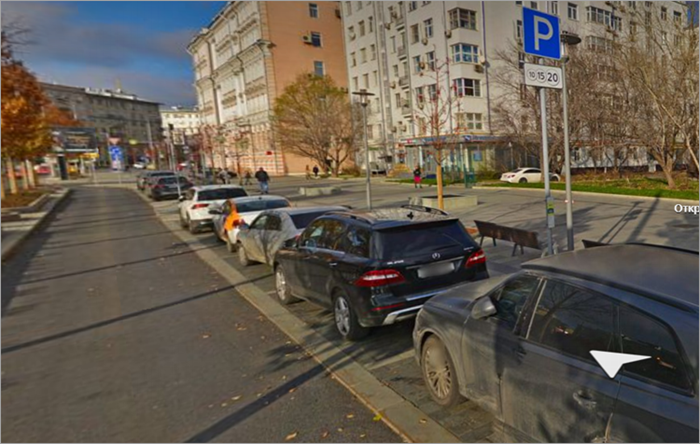
If the parking space is delineated with paving tiles, draw them as well.
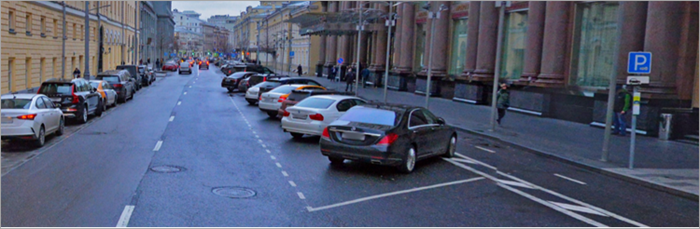
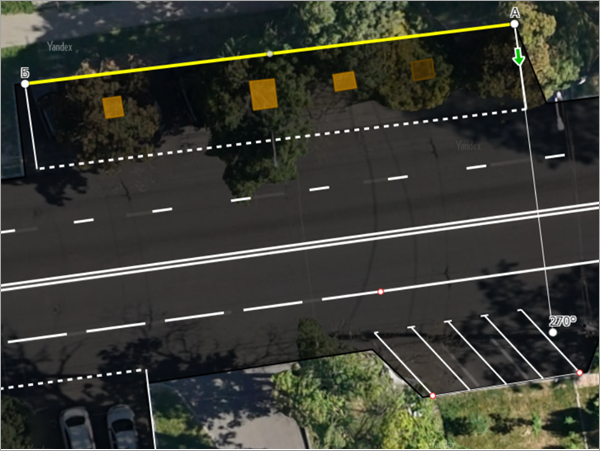
3.19.4.20. Dotted, angled roadside parking lines
Note
If a parking pocket uses only one marking of this type, set the angle to 90 or 270 degrees by default.
Example
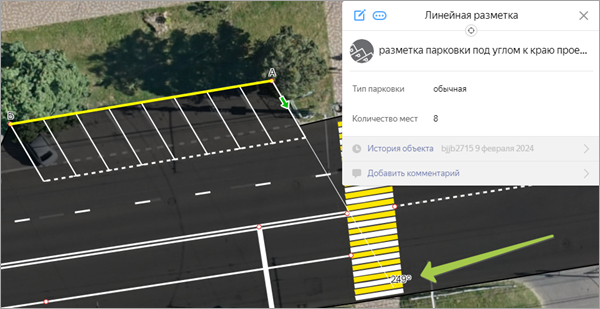
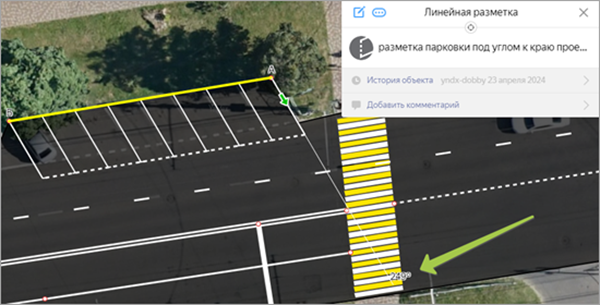
If a parking pocket uses this marking in combination with the Parking zone boundary
marking, make sure their angles align.
Example

3.19.4.21. Rumble strips
Use this type to draw rumble strips. For this type, the drawing direction is critical: the strips generate on the left relative to your drawing direction. To finish drawing, specify the number of strips.
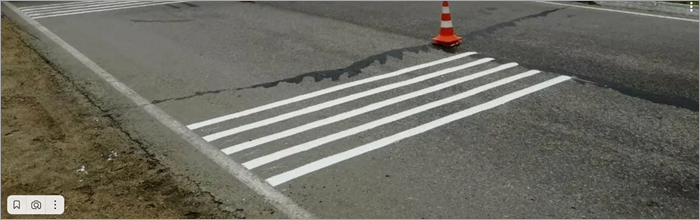
Note that rumble strips are distinct from tactile guidance paths used to create an accessible environment:
-
Rumble strips typically appear before dangerous road sections.
-
Tactile guidance paths are typically installed directly on pedestrian crossings and end in tactile paving.
Example of a tactile guidance path: