3.13.3. Rapid transit routes
Not all YME users can create rapid transit route options or add attributes to them.
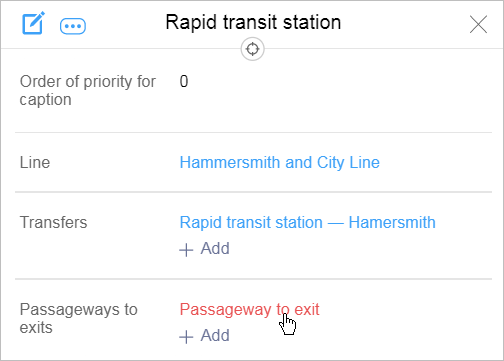
Rapid transit lines contain items such as routes, transfers (between rapid transit stations), and passageways to exits at rapid transit stations and entrances.
3.13.3.1. Create rapid transit route option
Techniques for drawing and editing composite linear items similar to rapid transit routes (like rivers and roads) are described in Section 2.6.2. Composite linear items.
Each route is made up of transport stops, which display time intervals between arrivals at stops, waiting time, and the time transport spends between stations.
Generally, a rapid transit route will follow one rapid transit line, but it may include sections that belong to other lines. For example, subway trains going through the “Park Kultury” station in Nizhniy Novgorod are either bound for the “Burevestnik” or “Gorkovskaya” stations, which are on different metro lines.
Every route has several route options. The simplest route includes two options (going forward and back), which is why every two-way rapid transit line should have at least two route options.
The time between arrivals, the time in-between stations, and waiting time must all be specified in seconds and display their status as per 12:00 (transport's local time).
You can not create a route option without indicating the time interval between vehicle arrivals, time the vehicle spends traveling between stations, and waiting time at stations.
Route options are created based on the already existing rapid transit lines and stations by adding them to the route option.
To create rapid transit route options:
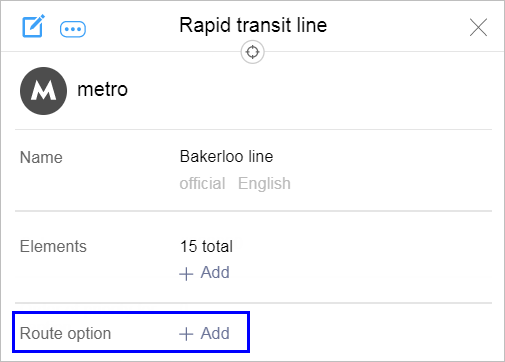
- Open the editing panel for a rapid transit line and click Add in the Route option field:
The Rapid transit route option panel opens.
- In the Route option panel:
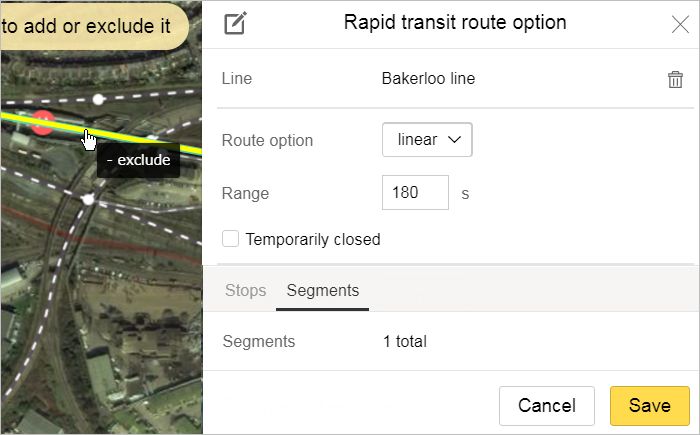
- In the Route type field, select the route type: Linear or Ring.Note.
The first and last stations overlap for circle route options. If the first and last stations don't match, this is a linear route option (even if its shape looks like a circle).
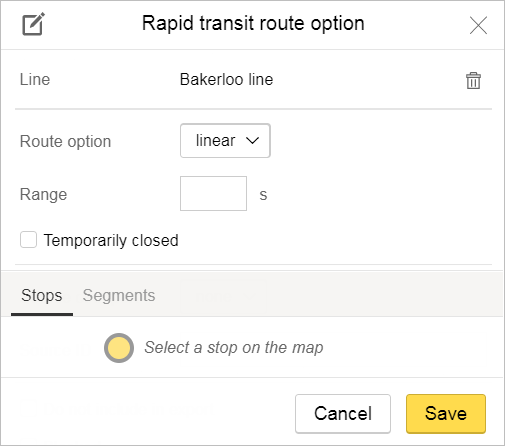
- In the Interval field, enter the time interval between vehicle arrivals at the stop (in seconds).
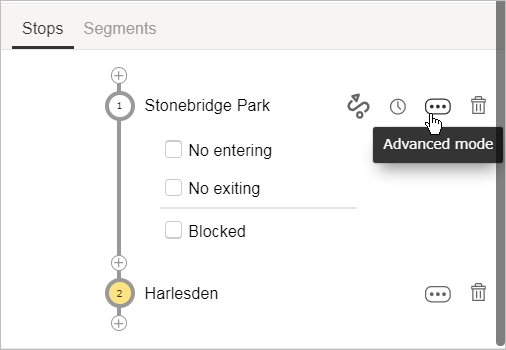
- A list of route stops is generated in the Stops tab (the stops are in the same order that the route follows):
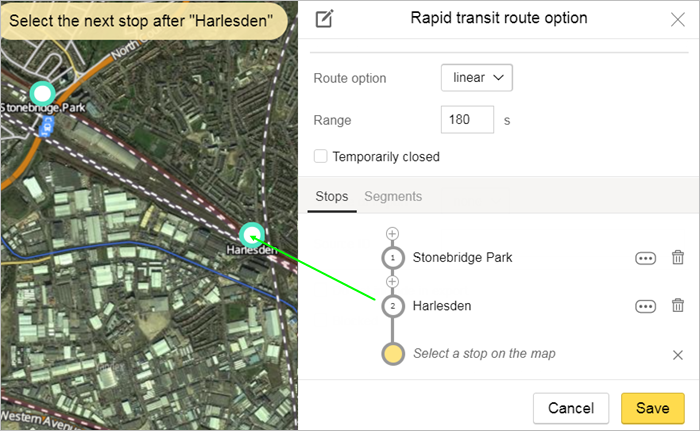
To add a stop, click
 . To delete one —
  .
. - Select a station and click
 (Advanced mode) to open the following fields:
En route — enter the time en route between the highlighted station and the following one (in seconds).
Time limit — Enter the length of time that the vehicle remains at that stop (in seconds).
No entering — check the box if passengers can not board at the station you selected.
No exiting — check the box if passengers can not exit at the station you selected.
- Go to the Sections tab and enter the list of rapid transit line sections that are included in the route option.
To add a section of rapid transit line to the route option click on it. Click again to exclude it from the route option.
On the Sections tab, there is a counter for the sections included in the route option:
- Click Save to create a new route.
The new route option will be automatically named after its first and last stations. The name displays in the Route options field of the Rapid transit line panel as a link that opens the route option editing panel.
3.13.3.2. Create transfers
The Transfer item should be created for stations with a separate crossing: a crossing between stations that doesn't go out of bounds of the rapid transit area (i.e. through a turnstile) or through other stations.
You must always specify the transit time when creating Transit items.
Create transfers based on rapid transit stations that were created earlier.
To create transfers between rapid transit stations:
- Open the editing panel for a rapid transit station (Station A transfer) and click Add in the Transfers field:
The Transfer panel opens (the selected station will get entered as the beginning station of the transfer — Station A):
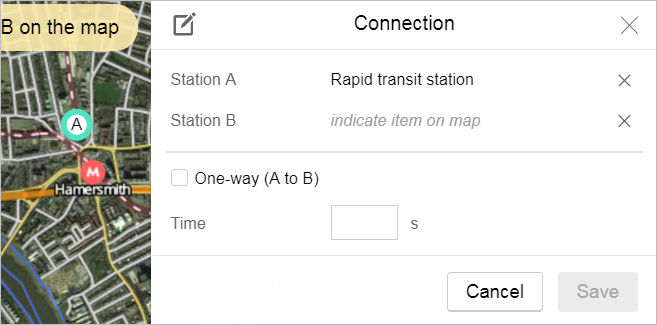
- Select the second station for the transfer on the map (Station B); its name will appear in the Station B panel:
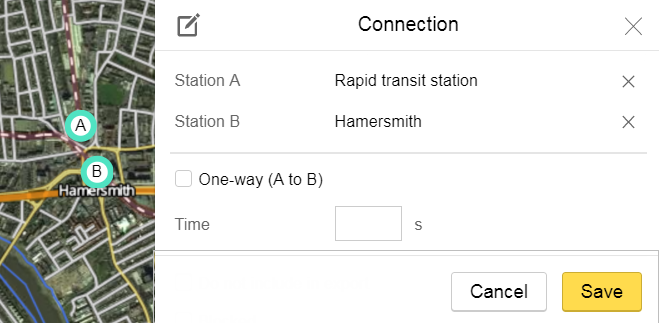
If a pair of stations has several transfer options that all go in the same direction, you only need to create one Transfer item and specify the shortest possible transfer time.
- In the Time field, enter the time it takes to transfer (in seconds).
- In the One way (from A to B) field — check the box if you can only transfer in one direction (A → B).
- Click Save to finish creating the transfer.
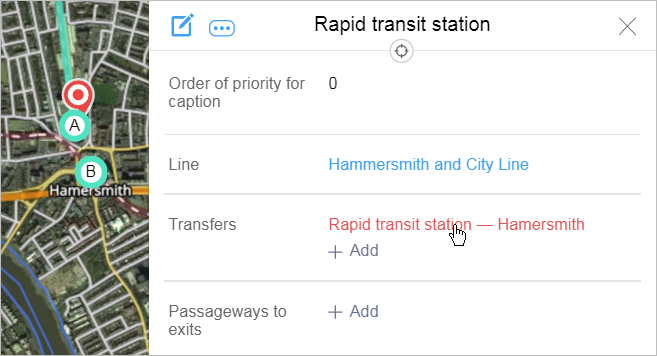
The transfer item will automatically take the combined name of its A and B stations, which will be displayed as a link in the Transfers field of the Rapid transit station panel and lead to the transfer editing window:
3.13.3.3. Create passageways to exits
Only create a Passageway to exit item for metro, monorail, rapid bus, or light rail transport (LRT) stations Don't create passageways to exits for aerial lifts and funiculars.
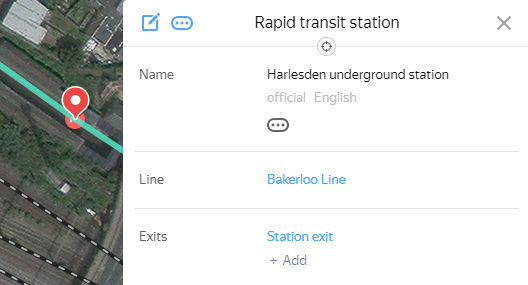
Passageways to exits must be based on existing rapid transit stations and their exits.
Duplicating passageways to exits is not permitted. Every pair of “station exits” should only have one Passageway to the exit.
To create a passageway to as exit at a rapid transit station:
- Open the editing panel for a rapid transit station and click Add in the Passageways to exits field.
The Passageways to exit panel opens (the selected station will be entered as the Station):
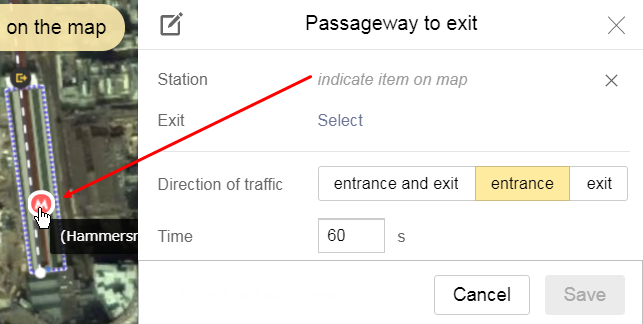
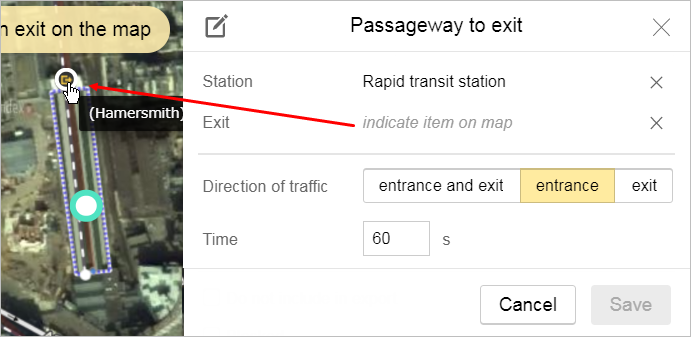
- Select a station exit on the map and its name will appear in the Exit field of the panel:
- In the Passageway to exit panel:
- In the Time field, enter the time it takes to exit onto the street from the center of the station (in seconds).
- In the Direction of traffic field, click the button that corresponds to the direction of traffic (only entrance to station, only exit from station, or in both directions).
- Click Save to finish creating the passageway.
The created passageway to exit will automatically take the combined name of its station and exit. The name displays in the Passageways to exits field of the Rapid transit station panel as a link that opens the passageway editing panel: