Banners
This page is outdated. If you have any questions about this section, please contact your manager.
On Market, you can set up and launch an advertising campaign with a banner image or video that will be shown to customers on the service's pages or on other platforms — Yandex Go, Yandex Delivery, Yandex Food, Yandex Shop. Banners make it possible to show products to more users in several services at once. This will help maximize the reach of an interested audience, attract the attention of new loyal customers to the products and brand, and increase sales.
The link on the banner can lead to any page on the Market where there is a product or category of products that you advertise. They must be available in the store that you are promoting. Some stores also have the option to leave links to external pages, such as their own website, as a test.
The cost of placing a banner depends on the set bid, which is the maximum price you are willing to pay for 1,000 impressions. There is a second—price auction on the Market: the banner of the participant with the highest bid wins, but you will need to pay less - the bid of the nearest competitor plus 0.01 ₽.
Before placing a banner
Banners on Market are classified as advertising materials, so they are required by law to be labeled. How to do it.
All materials are checked by moderators before publication. Before using the promotion tools on the Market, read the article Requirements for advertising materials.
What do banners look like and where are they displayed?
You can place banners on 5 platforms. All services are selected by default, and you can edit this list yourself.
Where and which banners can be placed
|
Market |
Yandex Go |
Yandex Delivery |
Yandex.Food |
Yandex. Shop |
|
|
Horizontal banner |
✓ |
✓ |
✓ |
✓ |
✓ |
|
Banner Banner |
✓ |
||||
|
Vertical banner |
✓ |
✓ |
|||
|
Video Banner |
✓ |
✓ |
Learn more about each format and display locations
|
Format and features |
What it will look like |
|
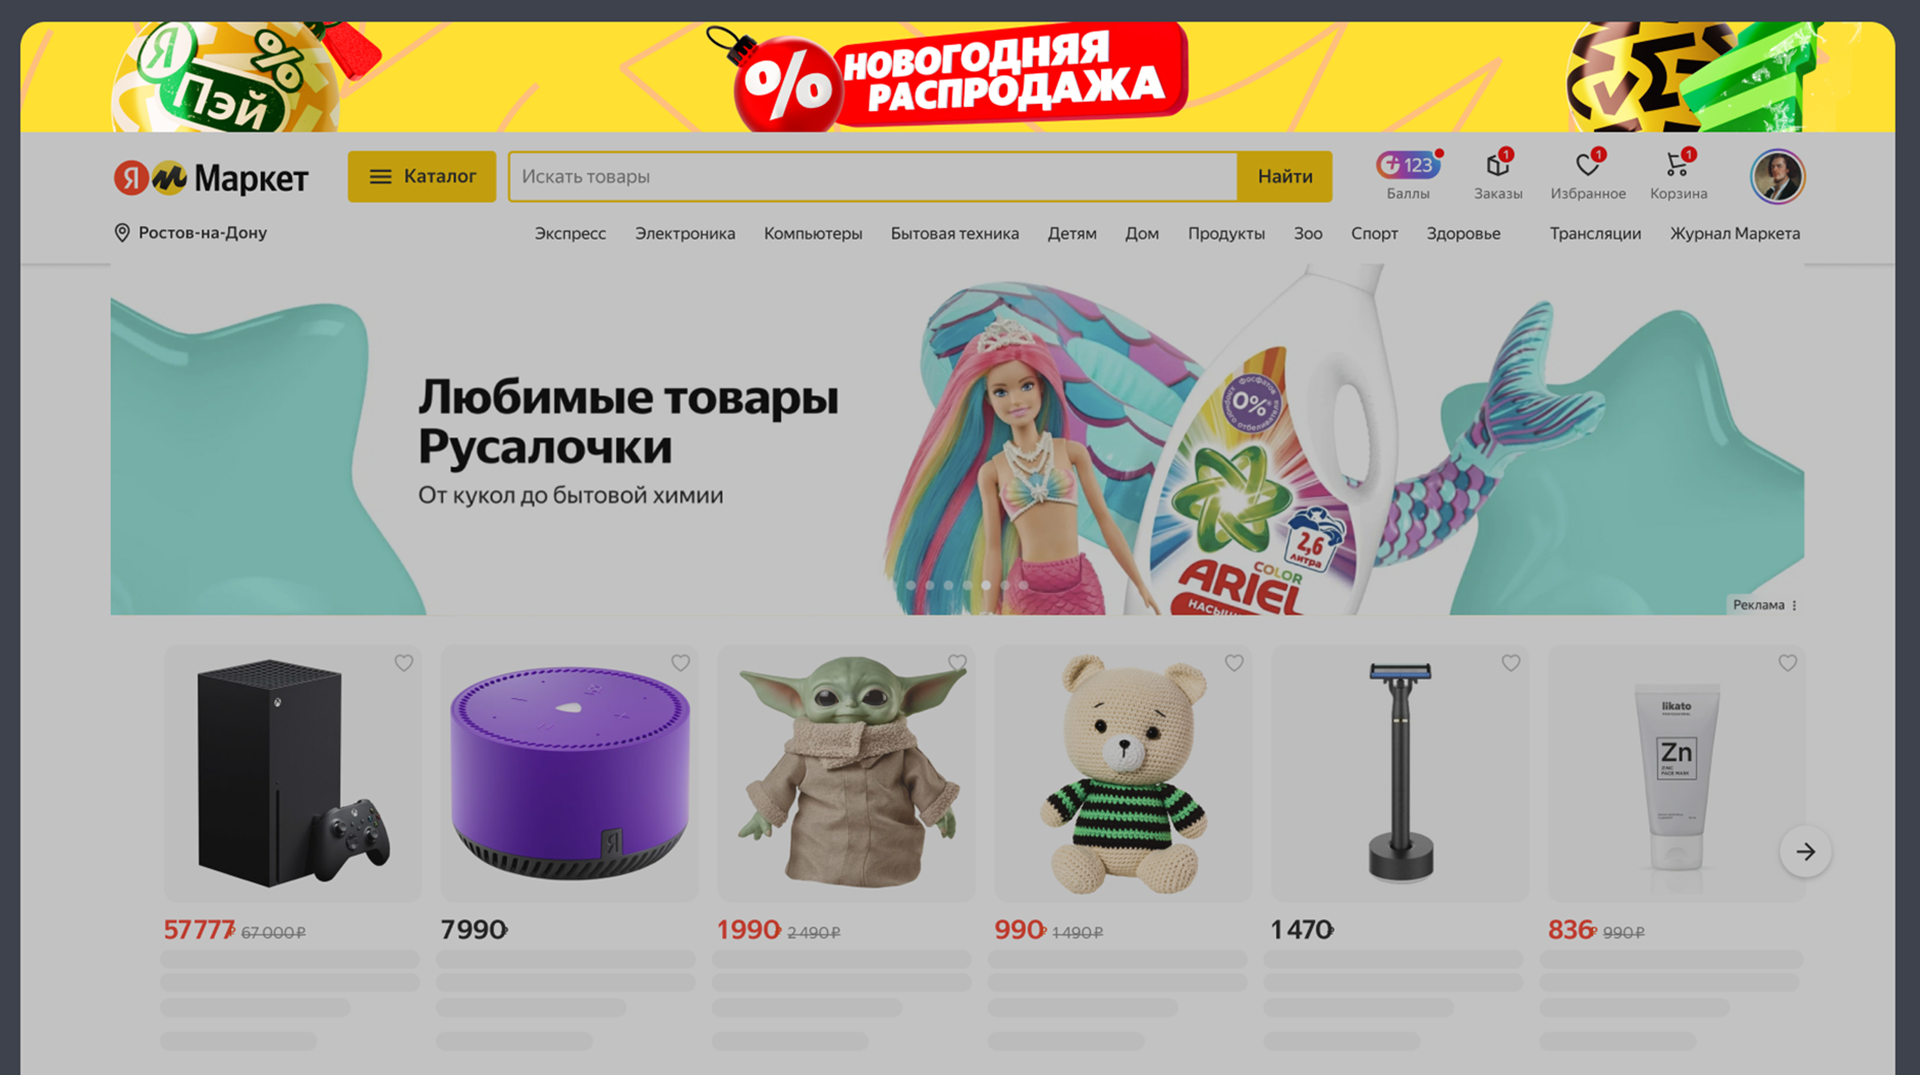
Horizontal banner. Size 1080 × 450. |
On all devices — on the main page, in the product feed, in the product profile, on the feedback pages, questions, and the successful order page.
|
|
The banner is a banner. Size 1706 × 184. Background requirements: uniform color of the entire banner or the same uniform color at the right and left edges. To make the background uniform around the edges, add a gradient. Example
|
On all the Market pages, except for the shopping cart and the order payment form, in the computer version.
|
|
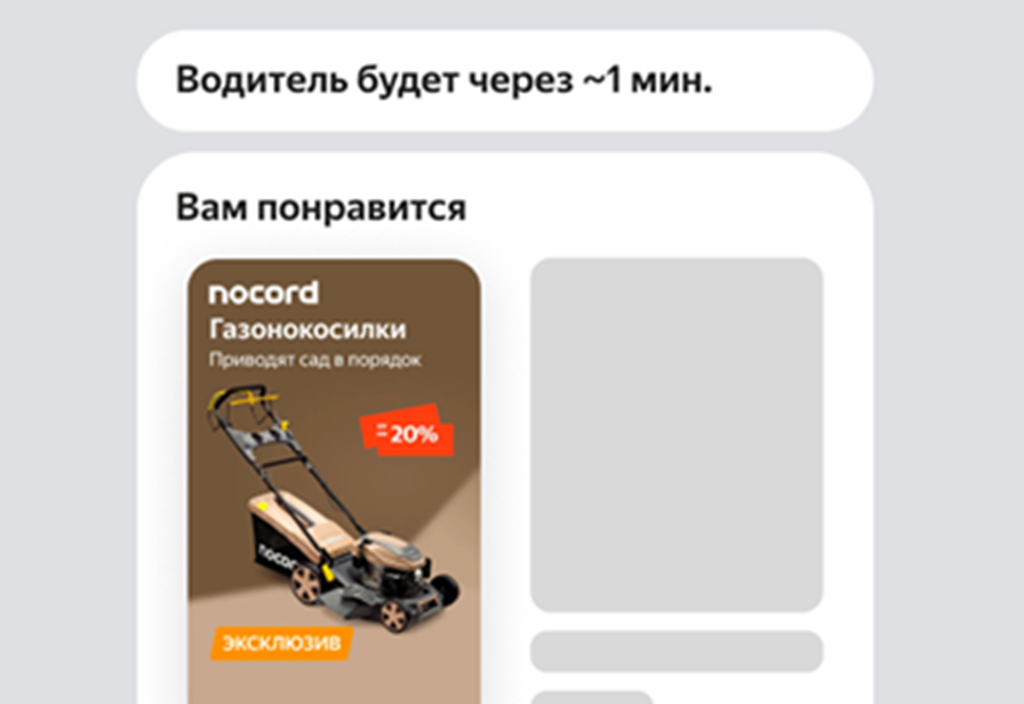
Vertical banner. In two formats: from 940 x 1524 pixels and from 1080 x 450 pixels. On the first banner format, do not place important information at the bottom — 232 pixels from the bottom edge may be hidden if the browser window is not wide. |
In the product feed on the main Market — on all devices. On the product card in the computer version.
|
|
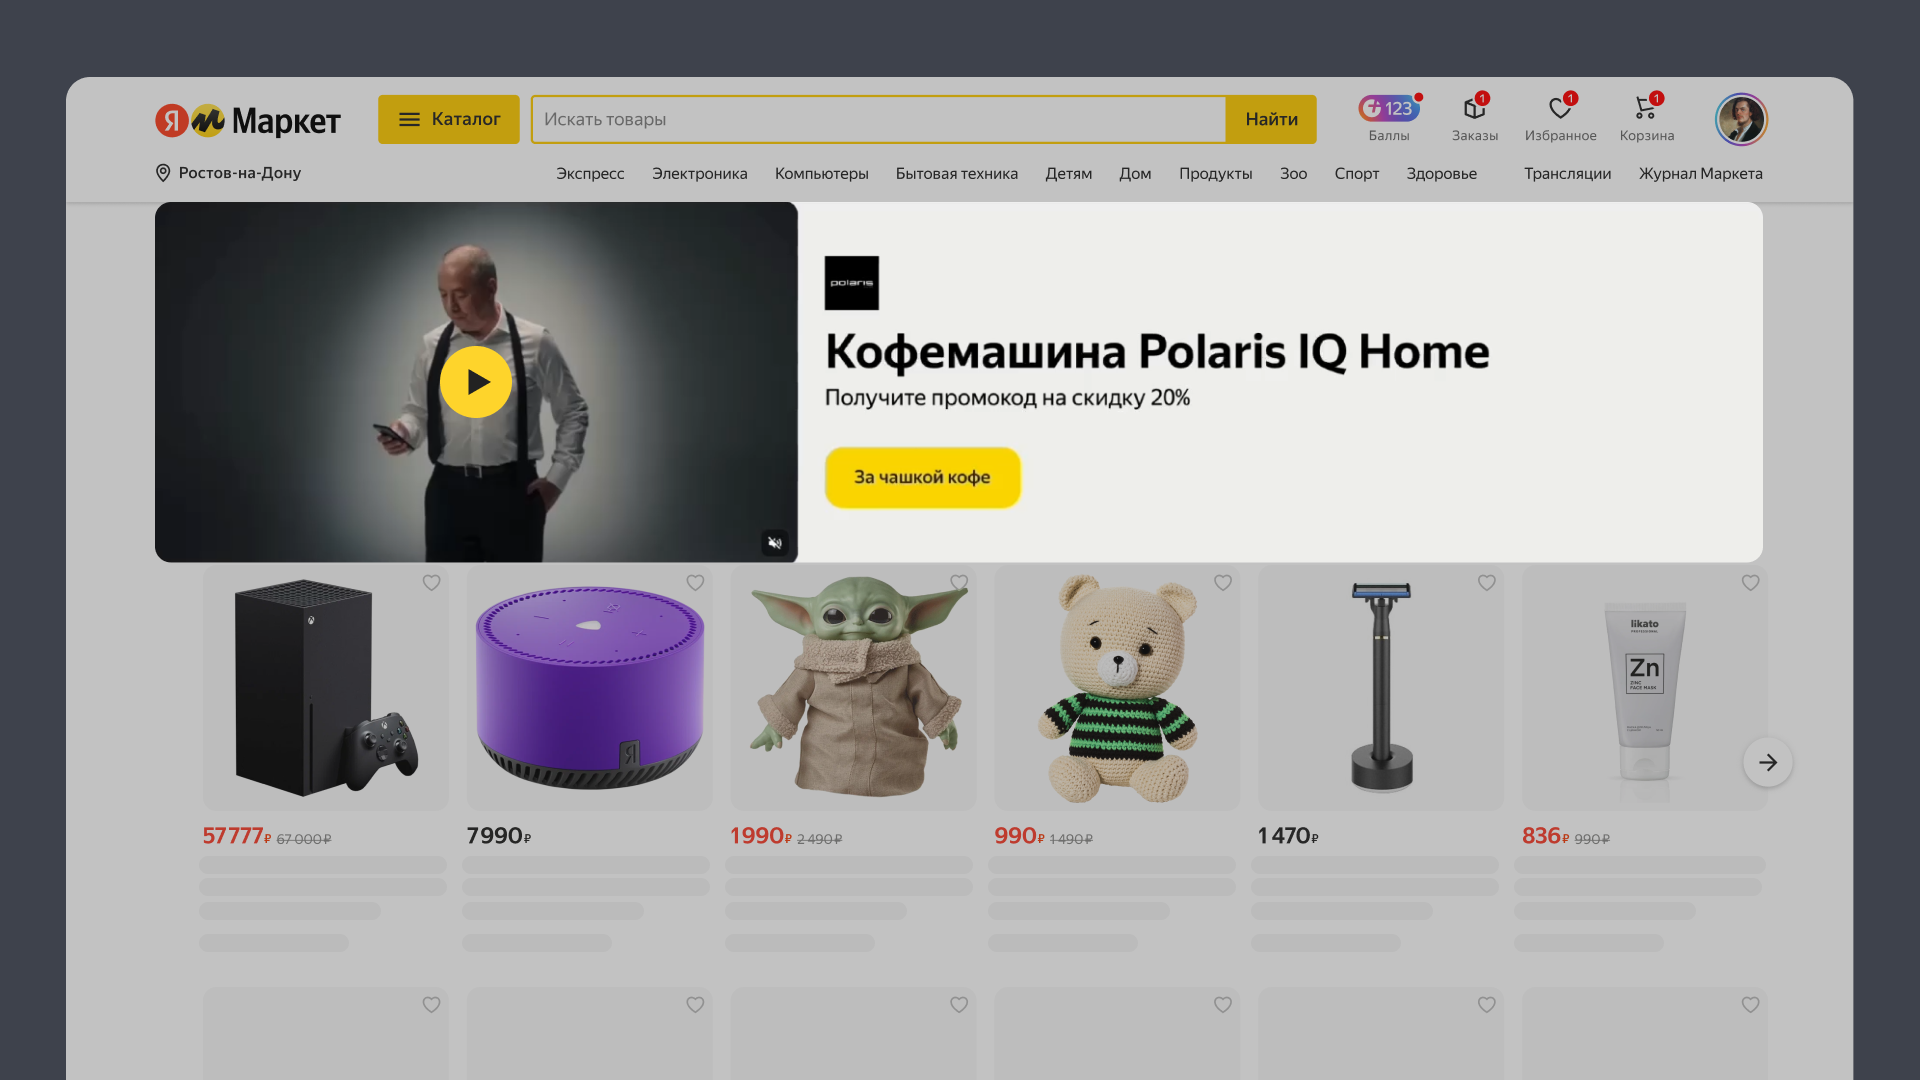
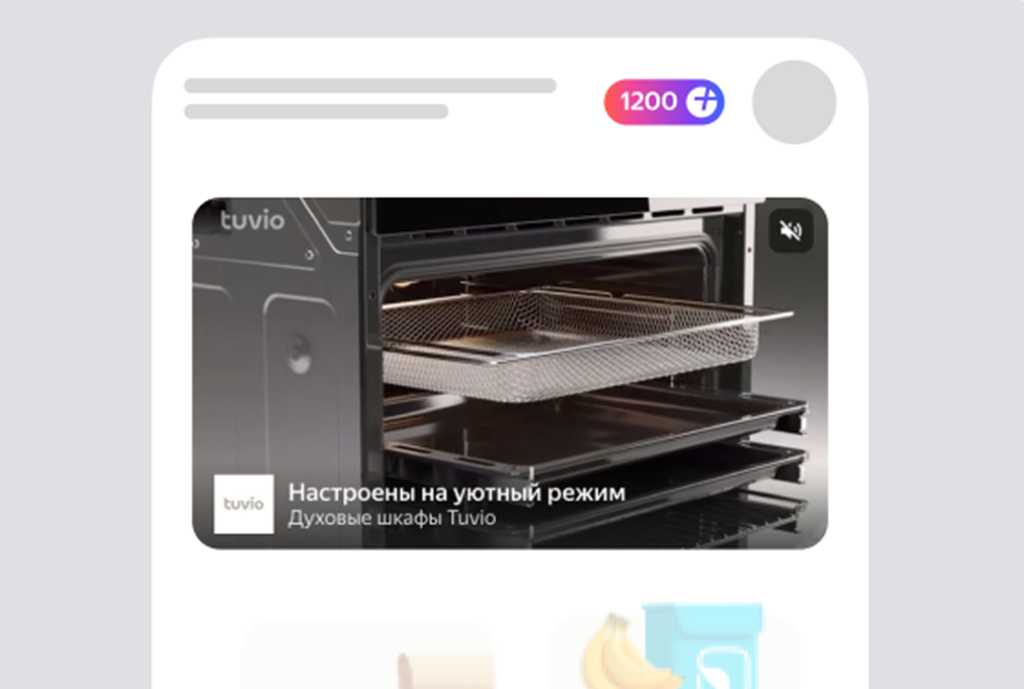
A video banner. The banner size will adjust in proportion to the video resolution, it can be from 960 × 540 px to 1920 × 1080 px. |
On the main page of the Market — both on the computer and on mobile devices.
|
.png)

|
Format |
What it will look like |
|
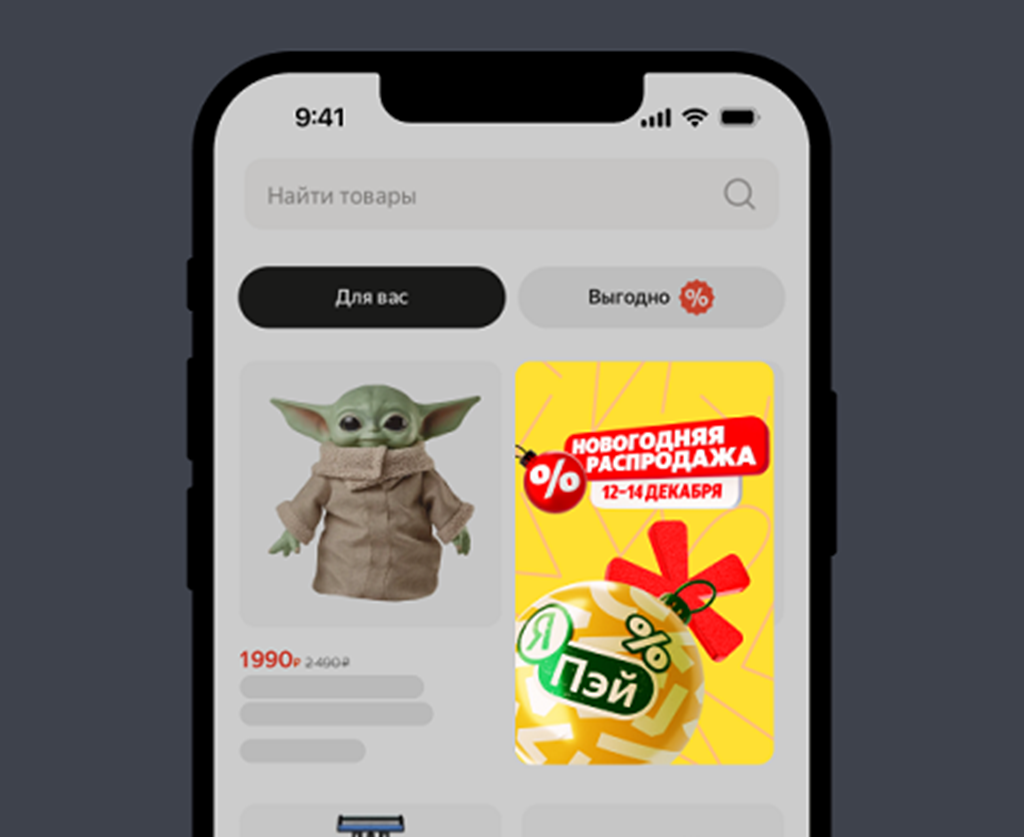
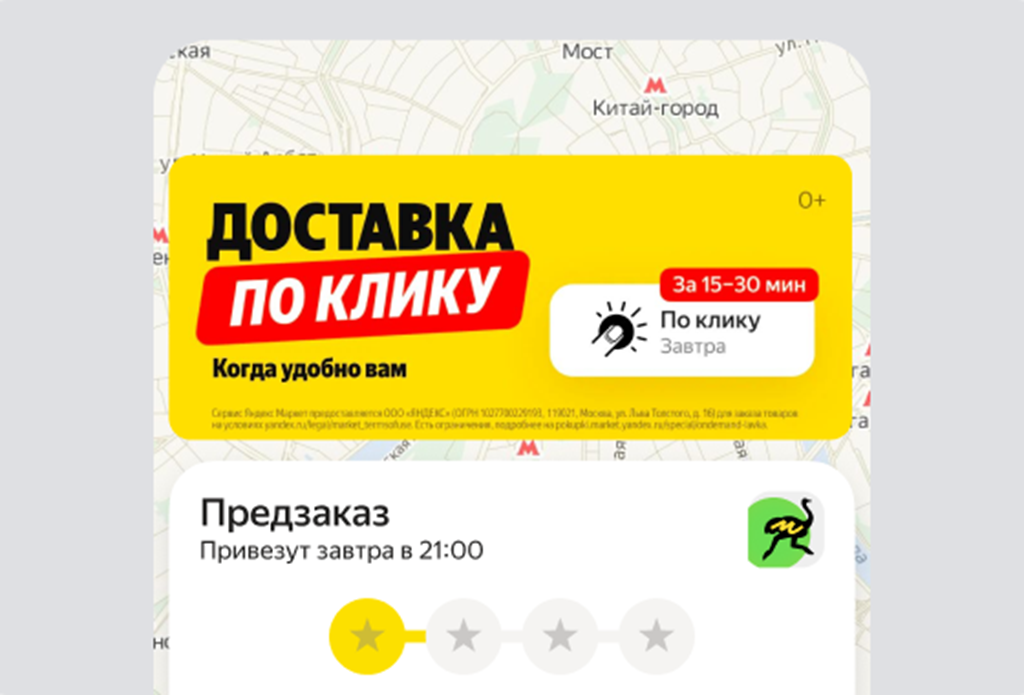
Horizontal banner. Size 1080 × 450. |
On the main page in the mobile app.
|
|
Vertical banner. Size 940 × 1524. |
In the Go feed in the mobile app.
|
|
A video banner. The banner size will adjust in proportion to the video resolution, it can be from 960 × 540 px to 1920 × 1080 px. |
In the Go feed in the mobile app.
|

|
Format |
What it will look like |
|
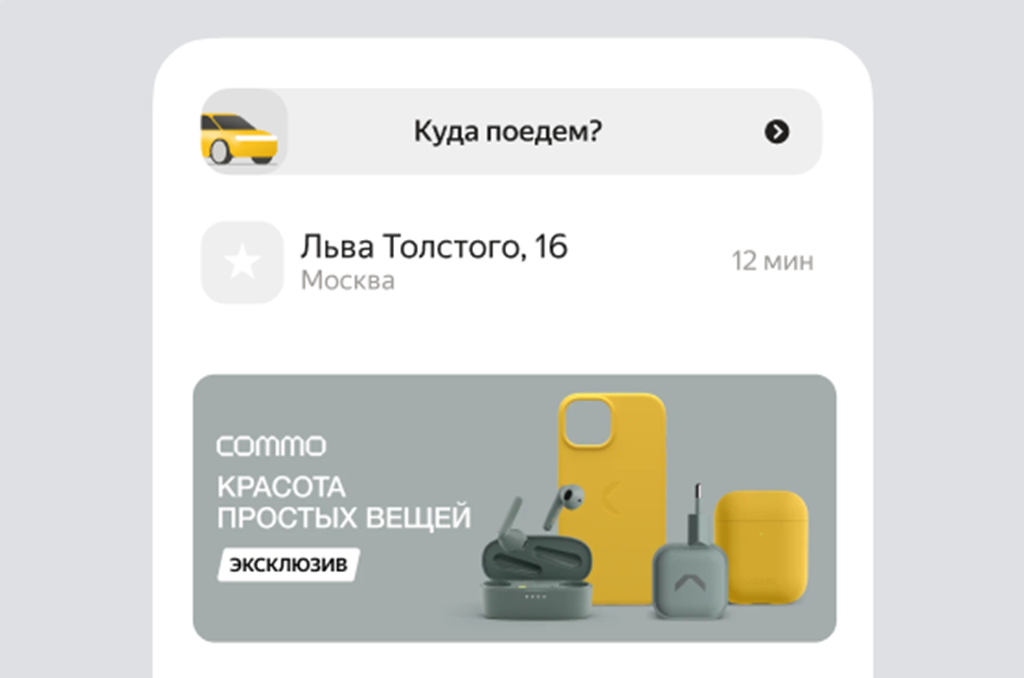
Horizontal banner. Size 1080 × 450. |
On the main page, on the order status tracking page, in the order history, in the search.
|
|
A video banner. The banner size will adjust in proportion to the video resolution, |
On the main page of the application.
|
|
Format |
What it will look like |
|
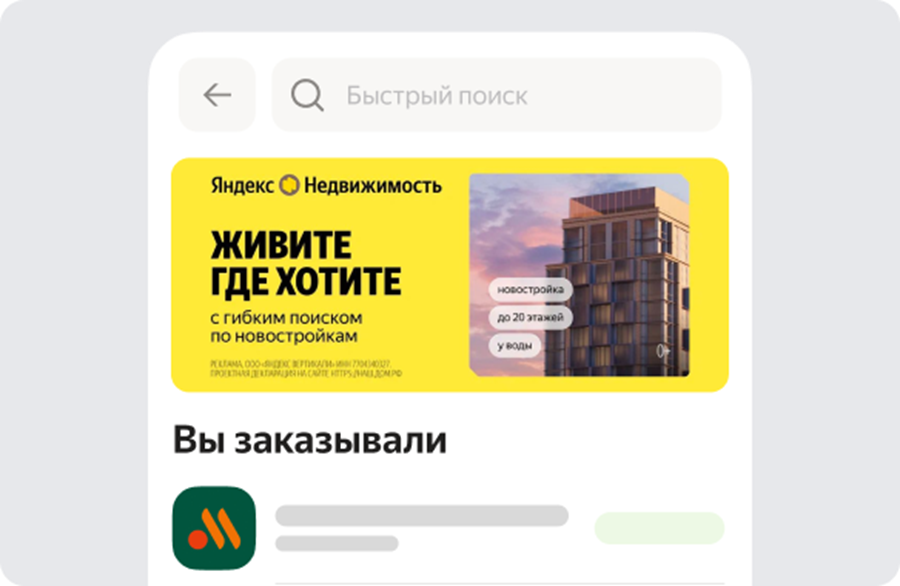
Horizontal banner. Size 1080 × 450. |
On the order status tracking page, in the order history, in the search.
|
|
Format |
What it will look like |
|
Horizontal banner. Size 1080 × 450. |
On the order status tracking page.
|
How to set up
The market helps you predict the result
During setup, the forecast shows the possible results of the campaign with the specified parameters. If you change the settings — increase the budget, add new regions — the data in the forecast is also automatically updated. This will help you adjust your campaign to achieve your goals and plan your promotion expenses before launching.

-
Open the page Promotion → Comprehensive promotion → Create a campaign.
-
Select a type: The banner for images or Video Banner for the video.
-
If there is at least one store in your account, you can choose the payment method. You will not be able to change it after creating the campaign. For more information, see How to pay
-
Select ad platforms and banner sizes. For video banners, select only ad platforms.
-
If you want the banner to lead to other pages, such as your website, activate the clickout switch to go to external pages. Learn more about the format of the clickout — in the instructions. As part of the test, the feature is available to a limited number of stores.
-
Specify the links to the pages that will open when you click on the banners.
-
Prepare and upload images or videos — be sure to check out requirements for the materials on the banner.
Create a banner with YaGPTCreate in the constructorCopy the direct link to the product from the card — click on
 , select Copy link. Insert the link and specify the condition of the promotion, if it is planned: for example, a promo code or a discount amount. Click Create a banner — after that, the image generated by the Yandex neural network will be saved as a draft in the upload form.
If the option created by YandexGPT did not suit you, repeat the request or create a banner manually.
Making a suitable image will help a special banner builder in the Figma editor.
-
You can check what the campaign will look like for buyers. The preview is available only to you, and it's free. Click Post a campaign for 10 minutes and after 2-3 minutes, open the page where the banner will be located, for example, a product card in the Market window.: where the banners are displayed. Use the same account that you launched the test campaign from.
Previewing the campaign will help you understand if the banner elements are positioned correctly and if anything needs to be fixed before publication.
-
Select the regions where the banner will be shown to customers on the Market. You can select your own audience for each banner. You can set a list of regions in which it will be shown to customers.
-
If necessary, ask maximum campaign budget.
-
Schedule the activation and deactivation of the campaign — specify the start date and, if necessary, the end date. The campaign will automatically turn on when the start date arrives and stop working on the end date at the end of the day — or earlier if it reaches the budget limit. Dates are indicated according to Moscow time.
You can manually turn on or off a planned campaign ahead of time.
For the most visible promotion results, the Market recommends launching the campaign for at least 2 weeks.
-
Set a bid — the maximum price per 1000 impressions. If Market has enough data, it can tell you a competitive bid, which will increase the likelihood that your banner will be displayed on the page. In fact, you will need to pay less for the placement — the rate of the nearest competitor plus 0.01 ₽.
-
If necessary, set a daily budget. It can be disabled or changed later.
After creating the campaign, the Market will check the materials on the banner for compliance with the requirements, and make sure that everything is in order with the settings. Such a check can take up to 40 minutes. As soon as it is completed, you will receive an email with the results.
Upon completion of the verification, the campaign will be activated automatically. If necessary, select the option Launch manually after moderation — in this case, the campaign will not be activated until you manually launch it on the account page.
If the campaign was created by a Market manager, then you will need a separate confirmation to launch it. The owner or administrator of the account will need it on the page Promotion → Comprehensive promotion → Banners press Confirm in the campaign line. This must be done before the start date of the campaign, otherwise it will not start on time.
If necessary, you can edit such a campaign and click To run — it will automatically receive confirmation and start on the start date.
Maximum budget
The budget is the amount that you plan to spend on the campaign.
By default, the budget of any campaign not limited. It will work until you turn it off or until the end date set in the settings arrives.
To control the cost of displaying a banner, you can set a daily budget for it — a limit on the amount of expenses per day or for the entire campaign. To do this, select one of the following options when configuring it:
|
Maximum budget |
How it works |
|
For a day |
You set a budget for the day. The campaign runs until the amount of the fee for the ads shown during the day reaches the specified value. After the shutdown, the campaign will automatically start operating at 00:00 the next day. If you need to launch the campaign earlier, increase the budget size. |
|
For the campaign |
You set the total budget for the campaign and its end date. Banner impressions will be evenly distributed over the entire duration of the campaign, taking into account the settings, bid, and budget you specified. The campaign will stop when the end date arrives. |
The specified budget limit will take effect immediately. You can change it or delete it at any time.
How to install
-
Go to the page Promotion → Comprehensive promotion → Banners.
-
Find the desired campaign in the table and in the column Maximum, click Install.
-
Choose whether to set a budget for the day or for the campaign, and specify the maximum amount in rubles that you plan to spend on a banner campaign.
Frequency of impressions
Impression frequency — the number of banner impressions per user in the selected time period. For example, no more than three times a week. The settings are valid for all services where the banner will be displayed.
Example
You have selected Market, Yandex Shop, and Yandex Go to place a horizontal banner, and you have set the frequency of impressions to 1 time per week. The user saw the banner on the Yandex Go homepage. He will not be shown a banner on any of the sites for another week.
Limiting impressions will allow you to properly allocate your advertising budget and attract the attention of more customers.
The restriction is disabled by default. You can set it for all banners.
How to install
-
Go to the page Promotion → Comprehensive promotion → Banners.
-
Find the desired campaign in the table and in the block Frequency of impressions choose Specify the maximum frequency of impressions.
-
Specify the number of impressions and the period in days.
How to view the change history
To see who changed the campaign status, daily budget, and bid and when, go to the tab with the history of changes. There are two ways to do this:
- Click
 opposite the desired campaign → History of changes.
 - Open the desired campaign and click History of changes.
How to pay
Banner fees will be automatically deducted from customer payments once a month, along with the amount for other Market services. If you have several contracts in your account, you can choose which one you will pay for.
For each contract, the Market calculates daily the total amount that you can spend on banner and shelf promotion for that day — it is equal to 1% of the sales volume for the last 30 days. If 1% of the sales volume is less than 1,000 ₽, you can spend 1,000 ₽ on promotion. Only delivered orders are counted.
As soon as the amount for banner and shelf promotion under the selected agreement reaches this value, all advertising campaigns will be suspended until the next day. In order not to wait, you can create a new campaign with a prepaid banner or select another agreement in the campaign settings. The promotion will resume on its account.
Sometimes offsetting is not available — prepayment is enabled by default. Here are some reasons:
- you promote your brand's products in other stores,
- There are stores in the cabinet that have not yet been verified or have been disabled by Market in the last 3 months.,
- there are no products in the catalog yet,
- The market has determined that this is the only possible option.
You top up your marketing account, and the banner fee is deducted from it. When the money in the account runs out, the promotion stops.
This method is available only to legal entities: sole proprietors or LLC.
How to view the results
You can view statistics on your banner campaigns in the table on the page Promotion → Comprehensive promotion → Banners.
In the table, the Market displays basic information for each campaign for the period that you specify: for example, how many times the banner was shown to customers, on which sites, how many products were added to the basket, for how much, approximate promotion costs, and other indicators.
When should I evaluate the effectiveness of a campaign?
Not earlier than 10 days after the launch, so that enough data has accumulated.
What is in the statistics
- adding items to the shopping cart;
- the number of ordered items;
- conversion rate;
- the cost of the ordered goods;
- clicks;
- impressions;
- CTR is the percentage of clicks to impressions.
- reach — the number of unique users who saw the banner.
- Average impression frequency is the ratio of impressions to coverage.
- the share of estimated expenses from revenue from banners ordered through the campaign.
It takes into account the actions of customers with all products of the same brand and category in this store, committed within 10 days after the banner was displayed.
If the banner is displayed on several sites, in addition to the general statistics in the tab Targeting by ad platforms there will be details for each service separately (impressions, clicks, reach, etc.).
In the column Estimated expenses the planned amount is indicated. If the actual amount is lower, it will be reflected in the financial report:
- if you pay by mutual settlement — Finance → Financial statements → According to the cost of services,
- if you pay by prepayment — Finance → Financial statements → According to the marketing account.
The report can be downloaded as an Excel file, either for a single campaign or for all of them at once. It includes those campaigns in which there was at least one banner display during the selected period.
If you are launching a campaign with a video banner, in addition to the basic statistics, the file will also contain the following data:
- views — the number of times users have watched a video partially or completely. If one user has watched the video several times, only the first viewing is taken into account.
- VTR is the percentage of inspections to viewings.
- turn on or off the sound on the video. If one user has turned the sound on or off several times, only the first turn is considered.
- CPV is the average cost of watching the video all the way to the end.
How views and VTR are counted
The market automatically divides the video into 4 parts and counts the number of views up to 25% of the video, up to 50%, 75% and 100%. Then, for each group, the percentage of screenings from the total number of video banner impressions is calculated.
How to get the file:
-
One campaign at a time: click next to it
, select Generate a report and download it in the tab Ready-made files. -
For multiple campaigns: click
 in the upper-right corner, select Summary report (for all your campaigns) or By campaigns (only for the selected ones), click Generate a report and download it in the tab Ready-made files.