Video VPAID VAST 3.0 Viewability
Description
Video VPAID VAST 3.0 Viewability is a video ad format for players that support the VAST 3.0 standard. You can use it to upload a video file and display it as a Pre / Mid / Post-roll.
The viewability check is implemented in this format: the Viewable impression, Yandex event is counted if at least 50% of the video area is in the active browser window for at least 2 seconds.
Requirements for advertising materials
| Format | MP4, WebM, MOV, QT, FLV, AVI |
| Recommended format | MP4 |
| Frame rate | no more than 60 frames per second |
| Number of video tracks | 1 |
| Audio codecs | AAC, MP3, Vorbis |
| Number of audio tracks | no more than 1 |
| Minimum resolution | 1280 × 720 pixels |
| Duration | up to 2 minutes |
| The maximum size of the video clip to be uploaded to the Adfox interface | 100 MB |
If the video file size is more than 100 MB, you can upload the file to a third-party hosting service and specify a file link when adding the banner to Adfox.
Prepare the advertising materials:
- Video information that's required for adding a banner:
- Video width and height.
- The MIME type of the file.
- Video duration.
- The bitrate.
- A click link to the advertiser's site (if the banner is clickable).
- Links for banner measurement in third-party ad systems (if necessary). After you add the banner, put such links on the Events tab in the Click URL box for the event that you measure.
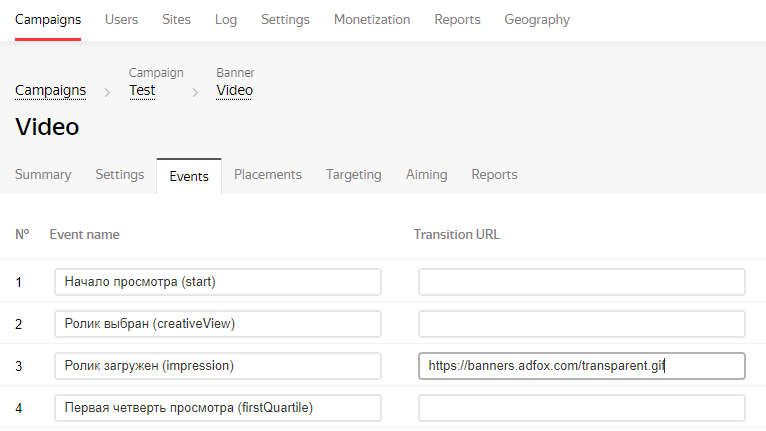
Events
The following events can be called in the template:
- The start of viewing (start).
- The video is selected (creativeView).
- The video is loaded (impression).
- The first quarter of viewing (firstQuartile).
- The middle of viewing (midpoint).
- The third quarter of viewing (thirdQuartile).
- Full view (complete).
- Turn the sound off (mute).
- Turn the sound on (unmute).
- Pause (pause).
- View from the beginning (rewind).
- Continue viewing (resume).
- Go to full screen (fullscreen).
- Expand (expand).
- Collapse (collapse).
- Go to the next video (acceptInvitationLinear).
- Click on the Close button, the user's exit (close).
- Click on the Skip ad text bar (skip).
- Click on the Click to the advertiser's website text bar (addclick).
- Error (Error).
- Viewable impression, Yandex.
Statistics on events are available in the report By event.
Add a banner to Adfox
When adding a banner to a campaign, select the banner type and template Linear-Ad (Pre / Mid / Post - Roll) VAST 3.0 Viewability.
Set the banner parameters:
- Click URL: Enter the link to the advertiser's site. For the click to work correctly, make sure that the link includes the protocol (
http://orhttps://). - Width: Specify the video size by width in pixels.
- Height: Specify the video size by height in pixels.
- Video URL: Specify the link to the video uploaded to a third-party hosting or upload the file.
Video files that you upload directly to the Adfox interface are automatically converted to different formats and sizes and saved to the Yandex video hosting. After the video is uploaded, the banner has the status
<paused>until the conversion is complete. After conversion, the video status changes to<converted>, and the banner status changes to the one that was before you uploaded the video:<active>or<paused>.If you specify a link to a video posted on an external resource, the video won't be downloaded and converted. In that case, the video will be displayed in the banner directly from the specified external resource in the form in which it's available via the specified link.
- Content type: Specify the MIME type of the uploaded video. For example,
video/mp4. - Duration (hh:mm:ss): Specify the duration of the video.
Skip offset: The period during which the text bar is shown Skip ad (hh:mm:ss): Specify the time after which the Skip ad button will appear from the moment the video starts playing.
- Text on the click bar: Specify the text for the button leading to the advertiser's site.
- Time before the Close button appears (mm:ss): Specify the time in minutes and seconds before the Close button is displayed.
- Allowed click (0 - no, 1 - yes): Specify whether or not the video banner will be clickable.
- Bitrate: Specify the quality of the video.
- Under Advertising label settings:
- In the Ad label list, select “Ad” or “Social ad”, and the label will be added to the banner. If the creative's design already includes the label, you can keep “Disabled” in the drop-down list.
- In the Domain field, specify the advertiser domain, and it will be added to the label:
"Advertising" | example.comor"Social advertising" | example.com(only if you select “Advertising” or “Social advertising” in the drop-down list).
To add a token to a non-clickable banner, enable the Show banner menu option in the banner settings. When the banner is served, the menu icon
 will be displayed in the upper right corner of it. When a user clicks this icon, the advertiser information and the copy token button appear (if ad register is enabled for the banner and a third-party token is specified).
The banner menu contains a link to the rules for using recommendation technologies. That is necessary to comply with paragraph 3, section 1, article 10.2-2 of Federal Law No. 149-FZ “On information, information technologies, and information protection”, dated July 27, 2006.
Important. If a banner is non-clickable (the Transition URL field is not filled in) and it is to be added to the ad register, be sure to show the banner menu. This is the only way to make the token available when serving the banner.Settings for Russian ad register: The section is only available if the Submit data to state register procedure is selected in the campaign settings. Fill in the fields in this section to register the creative in the Yandex advertising data operator. The creative is assigned a token automatically.
